post

The Importance of Drain Cleaning

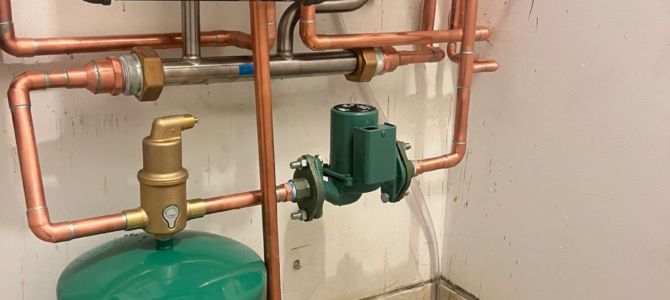
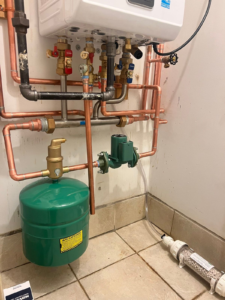
Drain Cleaning Philadelphia PA removes build-up in your plumbing system that could lead to clogs. It is often overlooked until a problem occurs, but it should be part of your regular maintenance routine.

Most plumbers recommend avoiding chemical drain cleaners as they harm pipes and the environment. Instead, choose one of the many nonchemical options available.

drain cleaning

Clogged drains are one of the most common plumbing problems. They can occur in any room of your home, but they are especially common in bathrooms. Excess hair can build up in the drain and prevent water from flowing properly, while soap residue can also cause blockages. Taking steps to minimize the amount of soap and shampoo that goes down your drains can help prevent these clogs. Using a shower cap or a drain stopper to catch excess hair can also be helpful.

Leaving a clogged drain to get worse can lead to costly damage to your pipes. Over time, the clog can cause the pipes to burst, leading to flooding and expensive repairs in your home. Clogged drains are best tackled as soon as you notice them, which is why it’s important to have a few DIY unclogging methods at the ready.

Pouring boiling water down a drain can often break up or dislodge a clog and allow water to flow freely again. This method works well for kitchen sinks, where grease and other debris can build up. If the hot water doesn’t work, try a more rudimentary approach–a wire hanger! Use the hook end to wiggle around the clog and then pull it up.

Another easy way to tackle a clogged drain is to use a plunger. A rubber plunger is ideal, but you can also use a metal plunger. When using a plunger, make sure that you cover the drain completely and that you are not pushing air out of the pipe. Press down and then quickly pull up, repeating this process several times until the clog is broken up or dislodged.

If you’ve tried both of these DIY methods without success, consider calling a professional to have the problem fixed. Store-bought drain cleaners are another option, though they are harsher on the pipes. A plumber can also advise you about preventing drain clogs by recommending the right materials for your home’s pipes and by encouraging regular maintenance. For example, a plumber can suggest installing a water softener for your home to reduce the amount of minerals that build up and prevent water flow.

A smelly drain or clogged toilet can stink up the entire room. Foul odors are caused by food, hair, soap scum and other debris that builds up in the drain or pipes. Regular drain cleaning helps eliminate bad odors and keeps them from coming back.

You may also notice that a sink or bathtub smells a little musty. This is usually a sign of a wet drain trap that needs to be dried out. Pouring a cup of baking soda down the drain followed by a cup of vinegar can help. After a few minutes, flush with hot water.

If you suspect that your home is experiencing a smelly sewer problem, call in a professional plumber immediately. They’ll be able to determine where the odor is coming from and fix the problem without damaging your home.

In addition to unpleasant odors, a clogged drain can lead to water damage in your home or business. Leaky drain lines can create puddles on the floors, walls and ceilings, which can cause mold to grow. Regular drain cleaning helps prevent clogs and reduces the risk of water damage.

Chemical drain cleaners are harsh and can damage your plumbing system as well as the environment. Caustic drain cleaners contain ingredients like sodium hydroxide, which can corrode metal and kill healthy bacteria in your pipes. These cleaners are best used for severe clogs and should only be handled by experienced plumbers.

A professional plumber can use mechanical tools to remove even the most stubborn clogs without compromising your pipes or health. In fact, these tools are far more effective than liquid drain cleaners in removing clogs.

A clogged drain or pipe can ruin your daily routine and leave your house or business with foul odors. By keeping your drains clean, you can prevent foul odors, save money on energy costs, and extend the life of your pipes and fixtures. For more information about the importance of drain cleaning, contact today!

Many homeowners use chemical drain cleaners when a home’s plumbing system becomes clogged. These chemicals’ corrosive properties break down the clog to allow wastewater to flow through. However, this type of drain cleaner often leaves behind residues and other harmful fumes. These fumes can be detrimental to a home’s pipes, as well as the health of a homeowner and his or her family. Liquid drain cleaners are also a hazard for children and pets. If they get liquid drain cleaner on their skin or inhale the fumes, they can experience severe burns, eye irritation and even respiratory issues.

The best way to avoid using chemical drain cleaners is to nip clogs in the bud with regular cleaning. By clearing the drains and pipes before they become blocked, homeowners can save themselves from costly repairs, odors, mold, pests, leaks and even frozen water in the winter time.

If you do need to use a chemical drain cleaner, be sure to follow the instructions on the label and take safety precautions. Wearing gloves, safety glasses and opening a window for ventilation will help to protect your skin, eyes and lungs. If you notice that a particular drain is smelling strongly, it’s a good idea to call your plumber right away. This could be an indication of a serious problem such as a broken pipe or a sewer line backup.

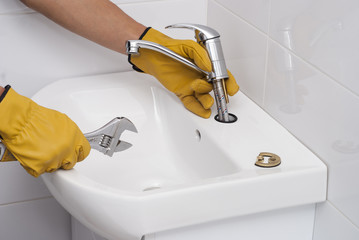
If you’re considering drain cleaning, be sure to call a professional plumber in Havertown. A professional will be able to identify and remove clogs, as well as make any necessary repairs to the plumbing system to prevent future problems. A professional can also provide a thorough inspection to confirm that the clogs have been removed and that the plumbing system is working properly. A professional can also advise a homeowner on nonchemical drain cleaning methods to keep the plumbing system functioning well for years to come.

Your drains are an essential part of your home’s plumbing system. Without working properly, they can cause all sorts of problems, from clogged sinks to water damage. That’s why it is important to keep them clean with regular drain cleaning services. A professional plumber in Havertown will be able to help you with this task and get your drains back to working as they should.

When a drain gets clogged, it can be very frustrating. It can also be dangerous for your health and lead to costly repairs. If you are experiencing issues with your drains, it is crucial to schedule a drain cleaning service right away. A clogged drain can affect your entire plumbing system and cause serious damage to your home.

A professional plumber will use tools like a snake to remove the clog and get your drains running again. This is a safer option than chemical drain cleaners, which can be harmful to your pipes and your health. Chemical drain cleaners often contain acid, which can eat through the material of your pipes and cause them to leak or burst.

Standing water in your home is a breeding ground for bacteria, mold and mildew. This can lead to serious health problems for you and your family. It can also ruin your furniture, flooring and other items in the area. Regular drain cleaning can prevent these issues from happening and keep your home safe.

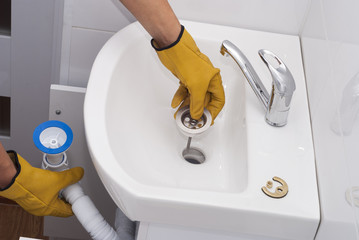
It is possible to do drain cleaning on your own, but it is usually best to leave it to the professionals. A professional will be able to use tools like a snake or hydro jetting to unclog your drains and clean out your pipes. This method is much more effective and safe than using a liquid drain cleaner.

You should also avoid putting anything down your drains that you shouldn’t. This includes grease, food particles, hair, paper and other debris. Regularly drain cleaning your home’s plumbing can help prevent clogs and save you money on water bills. If you notice a clogged drain, call your local plumber right away to schedule an appointment for drain cleaning.

post

Tankless Water Heater Repair

If your tankless water heater randomly shuts off, it may need Tankless Water Heater Repair Denver. A plumber can install a new fuse for about $50.

Many problems can cause a cold water sandwich, including sediment and mineral buildup. A plumber will flush your unit as part of routine maintenance to prevent this problem.

Tankless Water Heater Repair

During winter, water lines are more susceptible to freezing when the temperature drops. Frozen pipes can burst, leading to extensive water damage. Homeowners can prevent frozen pipes by keeping their homes well-insulated and checking for leaks regularly. They should also keep cabinet doors open in areas with exposed pipes, especially in unheated parts of the house, such as the basement or garage.

You can thaw frozen pipes by applying heat. However, before you do this, it is important to know what you’re doing and understand the risks. Never use a blowtorch, propane or kerosene heaters or anything with an open flame to thaw pipes. This could lead to fires or even a pipe explosion. A space heater, electric heating pad, or hot water can be used to apply heat. It is also important to keep the faucet for the affected pipe open to allow thawed water to drain.

Another way a water heater can malfunction is by having a faulty dip tube. The dip tube is what transfers cool water from the tank to the bottom so it can be reheated. If the dip tube is worn out, it can cause cold water to mix in with hot water. This will lower your water temperature and reduce your shower’s quality.

A plumbing professional will be able to diagnose and repair the problem. They will check the thermostat, circuit breaker and all other wiring to see if the problem is just with the heater’s heating element. If it is, they will replace the heating element and restore hot water to your home. They will also check the exhaust vent to make sure it is open and clear of blockages.

While tankless water heaters have fewer repair issues on average than storage units, they do still experience problems from time to time. One common issue is rust. Rust can occur on your heating elements or copper tubing. When rust occurs, it is important to repair it immediately to prevent the problem from getting worse and potentially causing more damage to the unit.

The cost of repairing rust on your tankless water heater will vary depending on the size and type of rust you are dealing with. For example, if your rust is on the copper tubing, it will be easier to remove and can be cheaper than if the rust is on the heating elements. The first step to repairing rust is to clean the surface you are working on. This can be done by using a variety of sandpaper starting with a 40-grit and moving up to a 80, 120, 180, 400, or 600-grit. It is also recommended that you use acetone or another chemical remover to ensure the area is free from any dirt, glue, or other debris.

If your tankless water heater is making loud rumbling noises, it may have a blockage or other problem. It can be difficult to diagnose the exact problem based on the sound alone, but your plumber will check things like the gas line sizes, thermal expansion tanks, gas sediment traps, and venting. They will also take a look at the unit to see if it needs descaled or to clean the burners.

A tankless water heater with a faulty gas valve can cause a lack of hot water in your home. Your technician will replace the valve, which is an expensive component. It is also recommended that you have your gas flex line replaced on a regular basis as it is a single-use part.

A pressure relief valve is an essential safety feature for your hot water tank. Heated water creates pressure, and if the temperature of the water or the pressure of the system goes over a safe threshold, the pressure relief valve opens to discharge hot water and steam. Without this vital safety mechanism, the tank could explode, leading to significant damage to your home or business.

The valve has a metal lever that snaps back and discharges steam or hot water into a drain tube. It’s important to test your valve regularly to make sure it’s working properly. If your valve is stuck open, or if it is constantly discharging hot water and steam, it may be time to replace the valve.

To do this, shut off the water supply to your water heater. Find the water heater’s discharge tube, usually located on the top of the water tank next to the cold water feed inlet. Place a bucket underneath the tube to catch the water that will drip from the discharge valve. Then, remove the inlet and outlet drain caps from the water heater isolator kit, and open both drain valves to release the pressure inside the tank. When the pressure inside the tank drops to a lower level, close the drain valve and close the inlet valve.

Then, with the power and water supply to your tank turned off, unscrew the valve from its opening using a wrench. Remove the old valve, and then screw in a new one with the same pressure rating as your current valve. Turn on the water supply and test the new valve. If it’s still leaking, you should call a repair service to replace the valve.

The burner assembly is an important part of the tankless water heater system, as it ensures the proper ignition and combustion of gas. If the burner assembly fails, the unit will be unable to heat up water on demand. This issue can be caused by a number of factors, including clogs, corrosion, and sediment. To troubleshoot this problem, it is essential to make sure that the gas supply is on and that the pressure is within specs. Also, ensure that the gas line is purged after installation.

The burning and combustion of fuel in the burner head of a tankless water heater is controlled by an igniter or flame sensor. If these components malfunction, the water heater will not turn on or may emit a smell of gas. It is possible to replace these parts, but it is best to leave this task to a professional.

Another common issue is a failure to ignite the pilot light. This can be solved by relighting the pilot or by adjusting the thermostat. If the unit still fails to ignite, it may be time to replace the pilot or the thermocouple. The cost of this repair varies depending on the water heater brand and model.

If you are experiencing these issues, it is important to call a qualified tankless water heater repair technician right away. They can fix the problem and restore hot water service to your home. In the meantime, you can try resetting the unit by ensuring that it is properly plugged in and that the circuit breaker or power switch is on. This will help prevent further damage to the unit and ensure that it is safe for use.

The air filter helps to keep bugs, dirt, and debris out of the unit. It needs to be cleaned or replaced regularly to keep it working properly. This task can be done by a homeowner, though it’s best to let a professional do it. This will ensure it is completed correctly and safely.

Another reason to schedule regular maintenance for your tankless water heater is to check the heat exchanger. A dirty heat exchanger can lead to leaking, rust, and other problems. It’s best to have a professional clean and inspect it on an annual basis to prevent these issues.

Sometimes, you’ll notice that you have cold water sandwiches while showering. This happens because someone else may have showered before you and used up all of the hot water in the tankless system.

When this occurs, the heat exchanger is trying to reheat your water but doesn’t have enough gas to do it. The result is that you get the dreaded cold water sandwich.

To prevent this from happening, make sure you switch the thermostat to “vacation” mode when you leave for long periods of time. This will prevent the heater from overworking and using up your gas. Also, you should have your professional drain and clean the water heater on an annual basis. This will remove any accumulated sediment and reduce the chance of damage or leaks. If you have a gas-powered unit, your technician will also inspect and adjust the gas pressure for optimal performance. This is also a good time to have your venting system checked for any obstructions or blockages that could be dangerous to you and your family. This is an important part of the maintenance process for all tankless water heaters, regardless of the type you have.

post

The Benefits of Leak Detection

In most instances, the longer a leak goes undetected, the worse the damage becomes. Timely detection and repair of leaks saves money, energy, time, and labor costs.

Leak Detection

Effective Leak Detection Los Angeles equips water utilities with the information to prioritize repairs and conserve water resources. This ultimately protects the environment and minimizes revenue loss.

A water leak detection system monitors your plumbing lines and shuts off the water supply when a problem is detected. This protects your home from expensive and potentially dangerous water damage. A few hundred dollars upfront can save you thousands in repairs and years of stress.

Many water leak detection systems use smart sensors that are designed to detect and alert you to the presence of a leak, and some even turn off the water supply automatically. They are typically installed inline with your existing plumbing, making them easy to install for any homeowner. They can be used in offices, kitchens, bathrooms, server rooms, or anywhere else where there is a risk of water leaks.

These sensors work by measuring the temperature of the water in your home’s pipes. When a leak is detected, the sensors will either sound an alarm (many are compatible with smart devices) or they will send an alert to your smart device. Smart leak detection systems can also be integrated with smart home devices, giving you the ability to act from anywhere in your home.

In addition to protecting your home from costly repair bills, a water leak detection system can save you money on your monthly water bill. Even small leaks can quickly add up to hundreds of gallons of water per week.

If you are looking for a more traditional method of water leak detection, you can look at the dial on your water meter, which should have a “leak indicator” that moves when water is being used. Alternatively, you can wait 1 or 2 hours and then check the meter again to see if the reading has changed.

One of the most common causes of water damage is old pipes and appliances that are close to the end of their life. In addition to causing expensive repair bills, these leaks can lead to the formation of mold in your home, which can cause a variety of health problems. Mold spores can trigger allergies, exacerbate asthma symptoms, and cause eye irritation and runny noses.

If you are concerned about water damage in your home, contact a plumber to learn about the different types of leak detection available. Some systems like Flo are serious investments, but they can be well worth it if they can prevent or minimize expensive repairs and prevent catastrophic damage to your home.

Sewer Leak Detection

If your home’s plumbing system has a leak in the sewer line, it can cause serious damage to your structure and put you and your family at risk of health problems. This type of leak can also lead to contaminated water in your home. Sewer leaks should be addressed as quickly as possible to prevent further damage and costly repairs.

Sewer leak detection involves a number of methods. Some of these techniques involve observing a property’s water level over time and determining whether it is rising or falling. Others require the use of a camera to inspect the condition of a sewer pipe and pinpoint a leak location. In some cases, a plumber may suggest hydrostatic pressure testing and a video inspection of the sewer line. This can identify sections of a slab sewer system where there is the potential for a leak to exist. The use of an inflatable test ball in the sanitary sewer system can further pinpoint areas where a leak is likely to occur.

Thermography is another method that can detect a sewer leak. This technique relies on the fact that a leak in a sewer line will create a temperature difference between the leaking pipe and the surrounding environment. Using a thermal imaging camera, a technician can analyze the surrounding environment to identify temperature anomalies that indicate a possible leak in the sewer line.

Another method that can help identify a sewer leak is to use an electronic sewer gas detector. This is a handheld device that will emit an electronic signal when it detects hydrogen sulfide or methane in your home’s plumbing. The sensor can then display a reading in parts per million concentration (ppm) on the device’s screen.

Other methods include physical approaches such as smoke testing and hydraulic pressure monitoring. These methods have the advantage of providing a quick and effective structural assessment of the condition of a sewer system at a local scale, but they are unable to capture the full extent of structural deterioration and are limited in their ability to detect large cracks above the waterline. Machine learning methods, on the other hand, are able to leverage big data to develop models that can predict the likelihood of pipe failure.

Gas Leak Detection

Gas leaks pose significant health and safety risks, and can be particularly dangerous for children, elderly people, pets, and those with respiratory conditions. Inhaling harmful gases can cause a range of symptoms, from headaches and dizziness to organ failure and death. Luckily, there are several ways to detect dangerous gas leaks.

The most common method is to use a gas detector. These devices are designed to detect the presence of natural and propane gas in a given space, and will emit an alarm when triggered. They can be handheld or fixed, and are a great choice for homes with gas appliances. Another easy way to detect a gas leak is to pay attention to hissing sounds. This sound is caused by escaping gas, and can be heard from a distance. Finally, a strong sulfur or rotten egg smell is often associated with gas leaks.

To ensure that your gas detection system is working properly, it is important to perform routine maintenance. This includes cleaning and inspecting gas meters, and making sure that all connections are tight. In addition, it is important to check your gas lines regularly for signs of corrosion or fractures. If you notice any of these signs, it is a good idea to call a professional plumber for an inspection.

Whether you are using a handheld device or a fixed system, it is crucial to know how to calibrate your detector. This will help you determine the level of gas concentration in a given area, and will allow you to adjust the settings of your sensor accordingly. For example, if your device is detecting dangerous levels of carbon monoxide, you will need to lower the calibration setting.

For commercial environments, it is vital to have a gas leak detection system in place. Leaks can significantly affect day-to-day operations and may lead to stock damage. In addition, the aftermath of a gas leak can be extremely damaging to an organization’s reputation.

A comprehensive gas leak detection system can provide a wide range of benefits for businesses. In addition to reducing operational costs, it can also improve employee and customer safety. Furthermore, it can reduce the risk of public health incidents and environmental damage.

Electrical Leak Detection

Detecting leaks that cause fires requires specialized equipment, but these devices can save lives and property. Many of these devices are also used to monitor water hazards and fluids transported by pipes. They come in a variety of sizes, shapes, and designs, and may include sensors and wires to measure temperature or pressure. They can even be programmed to alert the authorities when they sense a hazardous situation. Leak detection systems are useful for a wide range of applications, from monitoring oil pipelines to testing for underground sewer leaks.

Electrical leaks can be a serious hazard and can cause devastating fires. These types of leaks are often caused by faulty wiring or by an electrical outlet that is overloaded. It’s important to be able to identify these issues quickly and efficiently, and this is where leak detection comes in.

A new device has been developed that can be installed in electrical lines to detect leakage current and warnings. The device is made of a current transformer (CT) with a high-gain linear converter and low-power NB-IoT wireless communication technology. Its dimensions are 66 mm (outer diameter), 45 mm (inner diameter), and 10 mm (height).

The device uses a sensor to measure the ambient temperature and a high-speed microcontroller to calculate the measurement data. It then transmits this information to a cloud server using NB-IoT wireless communications technology. Once the data is uploaded, the device’s built-in sensor will monitor the voltage to detect the presence of leakage current. The device will then transmit a warning to the electrician for immediate action.

This device can also be used to help in maintaining and troubleshooting electrical wiring problems, such as short circuits, overloaded outlets, or aging wires that are prone to deterioration. It can be attached directly to the electric meter and is powered by a single lithium battery. The device has external lights that indicate the normal condition with a green LED light, and the abnormal condition with a red LED light.

If you suspect that you have an electrical leak, start by turning everything off in your home and then checking the electric meter. If it still shows usage, you may need to break down the breaker panel in your house and check each outlet or circuit one by one.

post

When to Call in Faucet Repair Services

Faucets are used constantly, so they’re bound to wear down over time. If left unattended, faucet problems can escalate into other more severe issues.

Faucet Repair

Handy professionals can quickly address spitting, spraying, or irregular water flow, saving you money on plumbing bills and potential damage. Visit https://www.plumberscranton.com/ to learn more.

Effective repairs start with knowing the type of faucet you have. The plumbers on Handy have experience with a variety of faucet designs.

A leaking faucet may seem like a minor inconvenience but over time it can lead to expensive problems. Dripping faucets waste water and can increase your household water bill. If ignored, a leaky faucet can eventually cause more serious plumbing issues throughout the house and damage your foundation. Luckily, most dripping faucets can be easily repaired with some effort from the homeowner. However, sometimes at-home fixes fail and it’s important to know when to call in a professional.

Washers are often the first part to wear out and start dripping, especially if you’re rough with your plumbing or over-tighten your handles. This is because the washer rests against the valve seat and over time the constant friction can cause it to wear out or break. Also, the washer can become damaged if it’s not the correct size or is inserted incorrectly.

The cartridge is the part that controls water flow into the spout. It can be corroded by sediment, worn down by continuous use or simply worn out from age. Once the cartridge is damaged, it will most likely need to be replaced. The best way to replace it is by removing the handle, securing it with a screw, and then using pliers to remove the packing nut. The next step is to replace the O-ring, which is easy to do once you know how (the replacement should be an exact match). You can also bring your old O-ring to a hardware store to ensure you’re purchasing the right size.

Once you have the new O-ring installed, the stem valve can be reassembled with the handle and decorative cap. Turn the water back on and check for leaks. If a drip continues, it’s time to contact your plumber for professional repair. It’s also a good idea to have your plumber inspect the entire plumbing system for leaks and other issues, which can be much more costly if left unattended.

Corrosion

Your sink faucets are in constant contact with water, so it’s no surprise that they can experience a lot of corrosion over time. Corrosion is the natural process by which certain metals react with oxygen and moisture, resulting in a degradation of their surface. In the case of faucets, this can manifest as rust and other problems that can make them less functional.

Most commonly, faucets corrode due to hard water. The minerals in hard water tend to build up on faucets and other surfaces that they come into contact with, which can lead to a white residue or film that’s often called scale. This residue can be very difficult to remove and may cause your faucets to look dull or discolored. It’s also possible for these deposits to clog your pipes, leading to low or no water flow at all.

Other causes of a corroded faucet include sediment buildup and the deterioration of various components over time, including seals, washers, or valve seats. In some cases, a faucet may simply be worn out, which can also result in leaks.

One of the biggest concerns with corroded faucets is that they can create corrosive water in your home. This can happen when copper, zinc, or lead particles break off of the pipes and contaminate the water that’s flowing through them. This can have a negative impact on your health and can damage the plumbing system in your home.

Corroded faucets can be an eyesore, but they’re also a sign that it’s time to call a plumber for professional faucet repair services. A plumber can thoroughly clean your faucets to remove any surface corrosion and get them looking like new again. They can also replace any worn parts, such as O-rings or washers, which may be contributing to the problem. In severe cases, you may need to replace your entire faucet assembly. This can be an expensive and time-consuming project, but it’s essential to protect your health and the longevity of your plumbing systems.

Sediments

It’s easy to take your faucets for granted until something goes wrong. When that happens, it can put a real damper on your day-to-day activities. A dripping faucet can ruin a good night’s sleep, and it can prevent you from getting ready for an important job interview or from preparing a meal for a large family gathering. Fortunately, a simple call to the local plumber can solve the problem and restore your peace of mind.

Your pipes may be clogged with sediment. Sediment is a residual compound that forms inside your hot water pipes. It typically consists of a mix of rust, hard water minerals, silt, clay, and dirt. It typically comes from soil erosion or decomposition of plants and animals. Wind, water, and ice often carry these particles to rivers, lakes, streams, and reservoirs that supply public and well water systems. These particles then travel to the homes served by those water lines. The rust and sediment can often leave behind a brownish tint on the water.

If you have a dripping faucet, the first thing you need to do is flush your water lines. This will help get rid of the sediment and restore proper water flow. However, if your water has a brownish tint, it could mean that there is an issue with the municipal water line or even the well water tank. This is another reason that it is always a good idea to hire the services of a professional plumber instead of taking on such a big project yourself.

The outlet and inlet seals of your faucet can also wear out over time, which will cause the faucet to leak. To fix this, you can replace the seals or have a plumber clean out the mineral buildup on the seals. Additionally, loose parts such as packing nuts and adjusting rings can restrict the movement of the valve stem or cartridge. To fix this, you can tighten the screws or replace them altogether. It’s a good idea to buy and keep a spare set of these parts so that you can quickly change out damaged components when needed.

Loose Parts

Sometimes a dripping faucet is simply the result of loose parts. Over time, the washers, O-rings, and valve seat can loosen or wear out, which means they are no longer able to form a tight seal. If a plumber disassembles your faucet, they can inspect these components for damage and tightness. They may also suggest replacing them if necessary to fix the leaking problem.

A dripping faucet can waste water and money. In some cases, it can even lead to serious water damage and pose health risks from mold growth. This is why it’s important to contact a professional plumber to diagnose and repair the problem as soon as possible.

Changing out parts can be done on a DIY basis, but some issues need the help of an experienced plumber. For example, if your leaking faucet is caused by corrosion in the valve seat, it requires the skills of a plumber to remove and replace it.

Other issues that require the attention of a professional include changes in water pressure or broken pipes. These types of problems are typically more severe and need to be addressed by a professional.

Some of the most common DIY faucet repair projects involve replacing worn out O-rings, washers, or valve seat. If you’re planning to tackle this project yourself, be sure to shut off your water supply before beginning. You should also have a bucket or towel nearby to catch any water that spills while you’re working. In addition, it’s a good idea to take photos or draw yourself a diagram of your faucet before you begin disassembling it. This will help you return the parts in the correct order and reduce the chance of future leaks. In addition, you should thoroughly clean the parts as you remove them to prevent mineral buildup and to ensure that they are free of loose debris. It’s also a good idea to use a penetrating oil, like WD-40, to loosen any stuck or corroded screws or nuts. This will help you get the job done faster and more easily.

post

Faucet Repair – How to Repair a Leaking Faucet

Faucets that leak can quickly become a major source of water damage in your home. While a few drips here and there can be corrected by tightening the handle or replacing worn parts, extensive rust or hard-water deposits may require replacement of the entire faucet.

Faucet Repair

Remove the decorative cap from each handle and expose the screw underneath with a flathead screwdriver. Set the screws aside in order of removal to save time when reassembling the faucet. Click Me to learn more.

Disassembly is necessary to inspect and clean the components, whether the faucet is sputtering or not. Often, the problem can be resolved by cleaning or replacing washers or O-rings that are easy to reach. You can also clean out any mineral deposits, dirt, or debris that may be causing the faucet to not work properly. During this process, it is important to take care not to damage any of the components.

To disassemble a faucet, start by shutting off the water supply at the two valves below the sink. Then, remove the handle by turning the screw in the middle of each handle counterclockwise. If the handle is corroded and doesn’t come off easily, try using a handle puller to make the job much easier.

Once the handles are off, you can start removing other parts of the faucet. First, locate the cartridge and the retaining clip that holds it in place. Then, use pliers to remove the retaining clip, which is circular in shape. Once the retaining clip is removed, you can then remove the cartridge.

After removing the cartridge, you can examine it for any signs of wear or damage. If it is damaged, you can replace it with a new one from your local hardware store. It is important to use a cartridge that is designed for your specific faucet model to ensure a proper fit.

If the cartridge is in good condition, you can then move on to removing the metal clips that hold it in place. These are circular metal clips that are located in the holes in the faucet body. You can usually locate them by looking at the underside of the faucet, or by removing the handles and seeing which part they are attached to. Once you have removed the metal clips, you can then replace the cartridge and reassemble the faucet.

If you have any other issues with your faucet, you can replace them as needed. You can purchase replacement parts from your local hardware store or online. Be sure to use the exact type and number of parts as recommended by the manufacturer to avoid any problems with a misalignment or leaks.

Inspect the Parts

A faucet’s parts can become worn out over time. Routinely check them for signs of wear and tear, and replace components as needed. Common problems include leaking, stiff or loose handles, and low water pressure. Fixing or replacing these components can restore functionality and improve the appearance of the sink.

Leaking: A dripping faucet wastes water and can damage your sink and countertop. Replacing the washers, seals, or cartridge can often solve this problem.

Stiff or Loose Handles: Over time, faucet handles can become difficult to turn on and off. This is usually caused by a worn-out handle mechanism or loose connections. Lubricating the handle mechanism or tightening the connection can help.

Low Water Pressure: Over time, mineral deposits can build up in the aerator and restrict water flow. Cleaning or de-scaling the aerator can help.

Leaky Faucet Body: In some cases, the valve seat may become worn out, causing leaks. Replace the valve seat or cartridge to resolve this issue.

Before you start working on your faucet, make sure that the shut-off valves are completely turned off. Then, place a bucket underneath to catch any residual water that may drip from the supply tube connections.

Remove the decorative escutcheon caps from the faucet handles to expose the mounting screws. Use a screwdriver to remove the caps and the handle(s). Once the handles are removed, you should see the mounting nuts for the spout (if applicable) and the faucet body. Remove these using channel-type pliers.

While you’re removing these nuts, be careful not to crack or scratch the sink or faucet. If the nut is too hard to grip with your fingers, you can try using an adjustable wrench or a basin wrench (which are designed to fit into small spaces). Whenever possible, always use hand-tightened locking nuts instead of force-tightened ones, as these are less likely to crack or break. After you’ve removed the old faucet and its supply lines, install the new faucet by sliding the water line hoses through the holes in the sink. Be sure to hand-tighten the locking nuts before moving on, and then finish tightening them with a pair of Channellock pliers.

Replace the Parts

A faucet is meant to last a long time, but regular use (which can cause wear on protective coatings or force the handles to move too hard) and environmental factors (such as hard water or mineral deposits) can shorten its lifespan. Faucets of all types can experience problems over time, including dripping, handle stiffness or looseness, and insufficient water flow. Fortunately, many of these issues can be resolved by replacing the necessary parts.

Before beginning any repair work, turn off the water supply by closing the shut-off valves located under the sink. You should also turn off the water supply to your home’s hot water heater if it is still on. Once the faucet is turned off, use a cloth or sponge to wipe it down to remove dirt, soap scum and mineral deposits. Regular cleaning can help extend the life of your faucet and reduce the need for more frequent repairs.

If your faucet is dripping, the problem may be caused by worn washers or a corroded valve seat. Replacing the washers or installing a new seat should fix the leak. In the case of a cartridge-style faucet, a faulty disc inside the cartridge can also cause a drip. Symptoms of this type of problem include the hot or cold water knob turning the wrong direction to turn on or off the faucet; replace the cartridge to correct the issue.

Aerators can become clogged with mineral deposits, which restricts the flow of water and can lead to water pressure problems. You can remove aerators by removing the decorative cap on top of the faucet or by using a special tool known as a faucet aerator key wrench. Once the aerator is removed, you can clean it by placing it in a bucket of vinegar or by soaking it in a descaling solution. You can then reassemble the aerator and reattach it to the faucet. It’s a good idea to take pictures of the disassembled faucet before beginning repair work so that you can easily reassemble it in the proper order. You should also note the position of each part so that you can easily identify them when reassembling the faucet.

Reassemble the Faucet

Once you have replaced the faulty components, it’s time to reassemble your faucet. Be sure to apply plumber’s tape to the threads of the valve and washers before reassembling to help create a watertight seal and prevent future leaks.

Begin by turning off the water supply to the dripping faucet. Use a sink basket strainer to catch any loose parts that fall during disassembly.

Next, remove the handle. On some faucets, the screw that holds the handle in place is concealed under a decorative cap. Gently pry off the cap with a knife blade to expose the screw, and then unscrew the handle screw with a screwdriver. On other types of faucets, the screw is located under a decorative sticker. You may need to remove the sticker with a blade or pliers to access the screw. Once the screw is removed, lift off the handle and the handle assembly.

You can now access the faulty cartridge or valve. Examine the replacement part for signs of wear and tear or damage, and make sure that it matches the original part that was installed in your faucet. Many issues with faucets are caused by worn-out washers and O-rings, so be sure to replace any that are damaged or worn down.

If your faucet has a disc cartridge, it is possible that the ceramic disk inside has cracked. This can lead to leaking from the bottom of the cartridge. It’s important to replace the cartridge in order to repair this type of leak. Once you have the new cartridge, install it into the faucet body and secure it with the retainer clip. You may need to twist the cartridge to ensure it is completely seated.

Once you’ve reassembled the faucet, turn the water supply back on and test it out by turning the handle to both hot and cold settings. If there are still leaks, it’s likely that you missed a connection during the disassembly or installation process, so check each joint for tightness and repair as needed. If the leaks persist, it’s time to call in a professional plumber.