Faucets that leak can quickly become a major source of water damage in your home. While a few drips here and there can be corrected by tightening the handle or replacing worn parts, extensive rust or hard-water deposits may require replacement of the entire faucet.
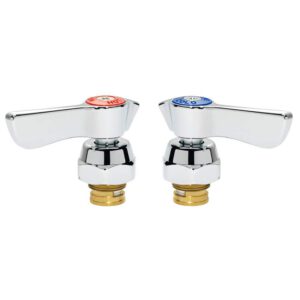
Remove the decorative cap from each handle and expose the screw underneath with a flathead screwdriver. Set the screws aside in order of removal to save time when reassembling the faucet. Click Me to learn more.
Disassembly is necessary to inspect and clean the components, whether the faucet is sputtering or not. Often, the problem can be resolved by cleaning or replacing washers or O-rings that are easy to reach. You can also clean out any mineral deposits, dirt, or debris that may be causing the faucet to not work properly. During this process, it is important to take care not to damage any of the components.
To disassemble a faucet, start by shutting off the water supply at the two valves below the sink. Then, remove the handle by turning the screw in the middle of each handle counterclockwise. If the handle is corroded and doesn’t come off easily, try using a handle puller to make the job much easier.
Once the handles are off, you can start removing other parts of the faucet. First, locate the cartridge and the retaining clip that holds it in place. Then, use pliers to remove the retaining clip, which is circular in shape. Once the retaining clip is removed, you can then remove the cartridge.
After removing the cartridge, you can examine it for any signs of wear or damage. If it is damaged, you can replace it with a new one from your local hardware store. It is important to use a cartridge that is designed for your specific faucet model to ensure a proper fit.
If the cartridge is in good condition, you can then move on to removing the metal clips that hold it in place. These are circular metal clips that are located in the holes in the faucet body. You can usually locate them by looking at the underside of the faucet, or by removing the handles and seeing which part they are attached to. Once you have removed the metal clips, you can then replace the cartridge and reassemble the faucet.
If you have any other issues with your faucet, you can replace them as needed. You can purchase replacement parts from your local hardware store or online. Be sure to use the exact type and number of parts as recommended by the manufacturer to avoid any problems with a misalignment or leaks.
Inspect the Parts
A faucet’s parts can become worn out over time. Routinely check them for signs of wear and tear, and replace components as needed. Common problems include leaking, stiff or loose handles, and low water pressure. Fixing or replacing these components can restore functionality and improve the appearance of the sink.
Leaking: A dripping faucet wastes water and can damage your sink and countertop. Replacing the washers, seals, or cartridge can often solve this problem.
Stiff or Loose Handles: Over time, faucet handles can become difficult to turn on and off. This is usually caused by a worn-out handle mechanism or loose connections. Lubricating the handle mechanism or tightening the connection can help.
Low Water Pressure: Over time, mineral deposits can build up in the aerator and restrict water flow. Cleaning or de-scaling the aerator can help.
Leaky Faucet Body: In some cases, the valve seat may become worn out, causing leaks. Replace the valve seat or cartridge to resolve this issue.
Before you start working on your faucet, make sure that the shut-off valves are completely turned off. Then, place a bucket underneath to catch any residual water that may drip from the supply tube connections.
Remove the decorative escutcheon caps from the faucet handles to expose the mounting screws. Use a screwdriver to remove the caps and the handle(s). Once the handles are removed, you should see the mounting nuts for the spout (if applicable) and the faucet body. Remove these using channel-type pliers.
While you’re removing these nuts, be careful not to crack or scratch the sink or faucet. If the nut is too hard to grip with your fingers, you can try using an adjustable wrench or a basin wrench (which are designed to fit into small spaces). Whenever possible, always use hand-tightened locking nuts instead of force-tightened ones, as these are less likely to crack or break. After you’ve removed the old faucet and its supply lines, install the new faucet by sliding the water line hoses through the holes in the sink. Be sure to hand-tighten the locking nuts before moving on, and then finish tightening them with a pair of Channellock pliers.
Replace the Parts
A faucet is meant to last a long time, but regular use (which can cause wear on protective coatings or force the handles to move too hard) and environmental factors (such as hard water or mineral deposits) can shorten its lifespan. Faucets of all types can experience problems over time, including dripping, handle stiffness or looseness, and insufficient water flow. Fortunately, many of these issues can be resolved by replacing the necessary parts.
Before beginning any repair work, turn off the water supply by closing the shut-off valves located under the sink. You should also turn off the water supply to your home’s hot water heater if it is still on. Once the faucet is turned off, use a cloth or sponge to wipe it down to remove dirt, soap scum and mineral deposits. Regular cleaning can help extend the life of your faucet and reduce the need for more frequent repairs.
If your faucet is dripping, the problem may be caused by worn washers or a corroded valve seat. Replacing the washers or installing a new seat should fix the leak. In the case of a cartridge-style faucet, a faulty disc inside the cartridge can also cause a drip. Symptoms of this type of problem include the hot or cold water knob turning the wrong direction to turn on or off the faucet; replace the cartridge to correct the issue.
Aerators can become clogged with mineral deposits, which restricts the flow of water and can lead to water pressure problems. You can remove aerators by removing the decorative cap on top of the faucet or by using a special tool known as a faucet aerator key wrench. Once the aerator is removed, you can clean it by placing it in a bucket of vinegar or by soaking it in a descaling solution. You can then reassemble the aerator and reattach it to the faucet. It’s a good idea to take pictures of the disassembled faucet before beginning repair work so that you can easily reassemble it in the proper order. You should also note the position of each part so that you can easily identify them when reassembling the faucet.
Reassemble the Faucet
Once you have replaced the faulty components, it’s time to reassemble your faucet. Be sure to apply plumber’s tape to the threads of the valve and washers before reassembling to help create a watertight seal and prevent future leaks.
Begin by turning off the water supply to the dripping faucet. Use a sink basket strainer to catch any loose parts that fall during disassembly.
Next, remove the handle. On some faucets, the screw that holds the handle in place is concealed under a decorative cap. Gently pry off the cap with a knife blade to expose the screw, and then unscrew the handle screw with a screwdriver. On other types of faucets, the screw is located under a decorative sticker. You may need to remove the sticker with a blade or pliers to access the screw. Once the screw is removed, lift off the handle and the handle assembly.
You can now access the faulty cartridge or valve. Examine the replacement part for signs of wear and tear or damage, and make sure that it matches the original part that was installed in your faucet. Many issues with faucets are caused by worn-out washers and O-rings, so be sure to replace any that are damaged or worn down.
If your faucet has a disc cartridge, it is possible that the ceramic disk inside has cracked. This can lead to leaking from the bottom of the cartridge. It’s important to replace the cartridge in order to repair this type of leak. Once you have the new cartridge, install it into the faucet body and secure it with the retainer clip. You may need to twist the cartridge to ensure it is completely seated.
Once you’ve reassembled the faucet, turn the water supply back on and test it out by turning the handle to both hot and cold settings. If there are still leaks, it’s likely that you missed a connection during the disassembly or installation process, so check each joint for tightness and repair as needed. If the leaks persist, it’s time to call in a professional plumber.