post

Tankless Water Heater Repair

If your tankless water heater randomly shuts off, it may need Tankless Water Heater Repair Denver. A plumber can install a new fuse for about $50.

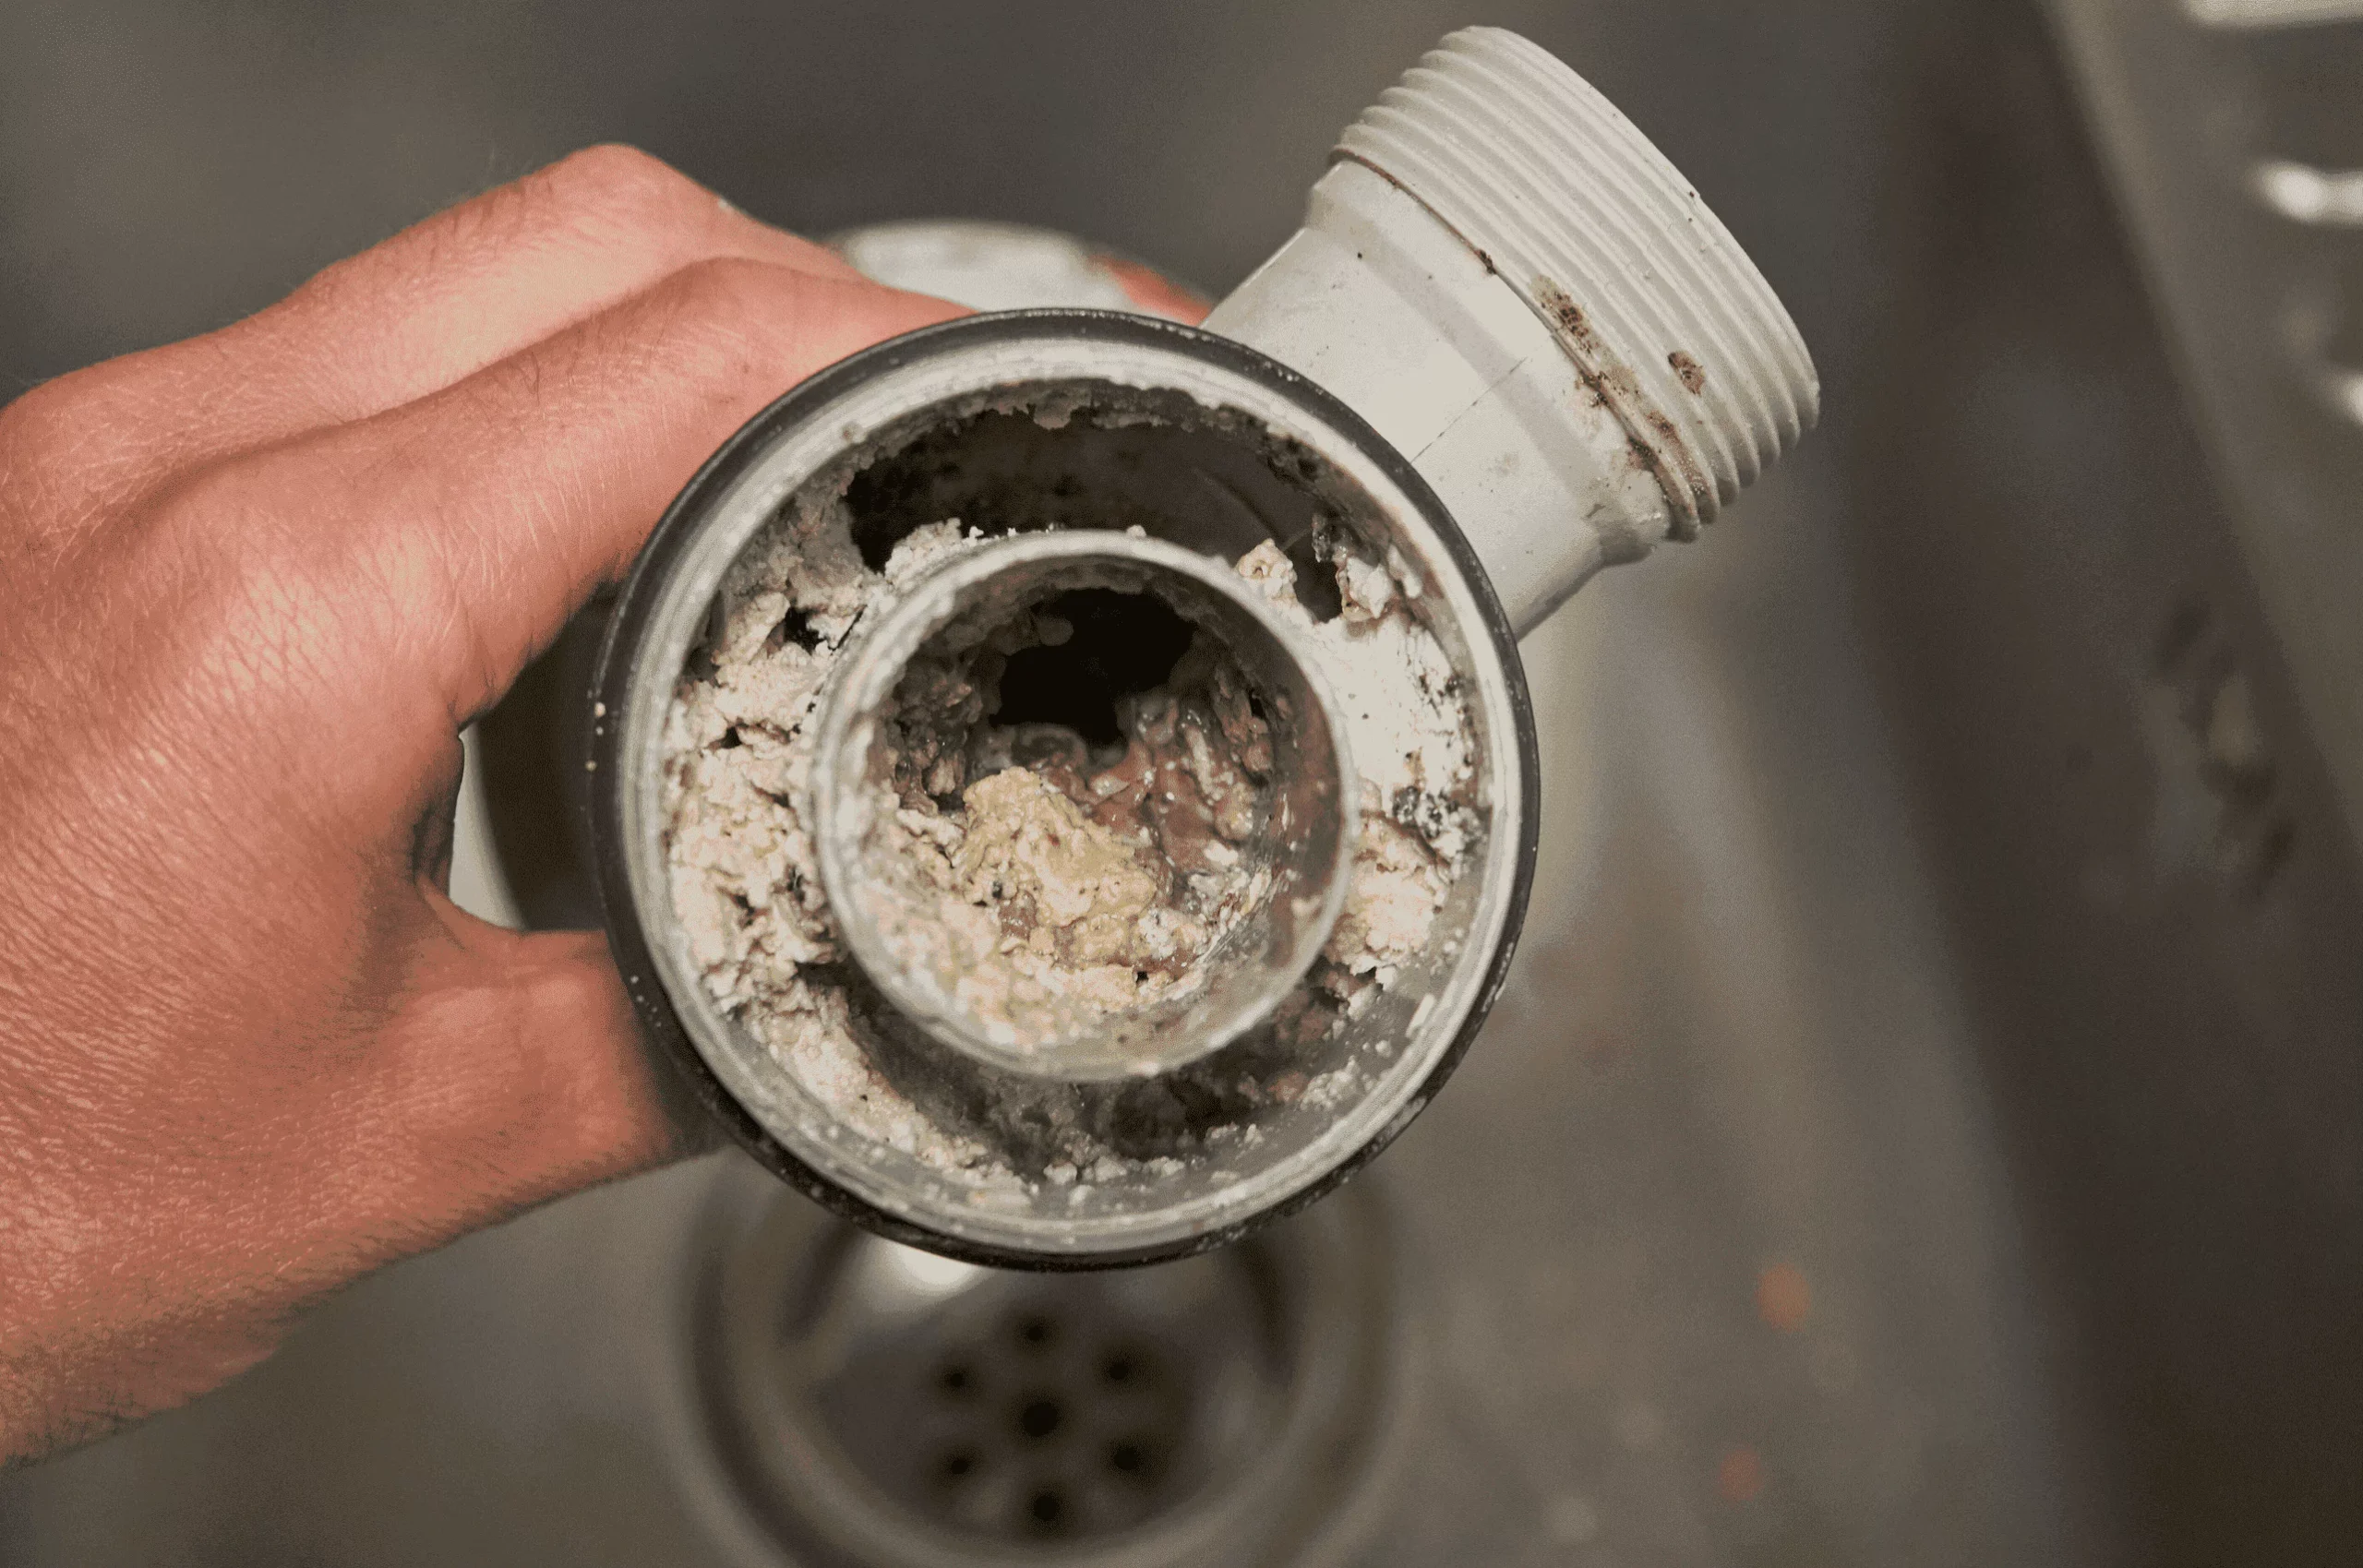
Many problems can cause a cold water sandwich, including sediment and mineral buildup. A plumber will flush your unit as part of routine maintenance to prevent this problem.

Tankless Water Heater Repair

During winter, water lines are more susceptible to freezing when the temperature drops. Frozen pipes can burst, leading to extensive water damage. Homeowners can prevent frozen pipes by keeping their homes well-insulated and checking for leaks regularly. They should also keep cabinet doors open in areas with exposed pipes, especially in unheated parts of the house, such as the basement or garage.

You can thaw frozen pipes by applying heat. However, before you do this, it is important to know what you’re doing and understand the risks. Never use a blowtorch, propane or kerosene heaters or anything with an open flame to thaw pipes. This could lead to fires or even a pipe explosion. A space heater, electric heating pad, or hot water can be used to apply heat. It is also important to keep the faucet for the affected pipe open to allow thawed water to drain.

Another way a water heater can malfunction is by having a faulty dip tube. The dip tube is what transfers cool water from the tank to the bottom so it can be reheated. If the dip tube is worn out, it can cause cold water to mix in with hot water. This will lower your water temperature and reduce your shower’s quality.

A plumbing professional will be able to diagnose and repair the problem. They will check the thermostat, circuit breaker and all other wiring to see if the problem is just with the heater’s heating element. If it is, they will replace the heating element and restore hot water to your home. They will also check the exhaust vent to make sure it is open and clear of blockages.

While tankless water heaters have fewer repair issues on average than storage units, they do still experience problems from time to time. One common issue is rust. Rust can occur on your heating elements or copper tubing. When rust occurs, it is important to repair it immediately to prevent the problem from getting worse and potentially causing more damage to the unit.

The cost of repairing rust on your tankless water heater will vary depending on the size and type of rust you are dealing with. For example, if your rust is on the copper tubing, it will be easier to remove and can be cheaper than if the rust is on the heating elements. The first step to repairing rust is to clean the surface you are working on. This can be done by using a variety of sandpaper starting with a 40-grit and moving up to a 80, 120, 180, 400, or 600-grit. It is also recommended that you use acetone or another chemical remover to ensure the area is free from any dirt, glue, or other debris.

If your tankless water heater is making loud rumbling noises, it may have a blockage or other problem. It can be difficult to diagnose the exact problem based on the sound alone, but your plumber will check things like the gas line sizes, thermal expansion tanks, gas sediment traps, and venting. They will also take a look at the unit to see if it needs descaled or to clean the burners.

A tankless water heater with a faulty gas valve can cause a lack of hot water in your home. Your technician will replace the valve, which is an expensive component. It is also recommended that you have your gas flex line replaced on a regular basis as it is a single-use part.

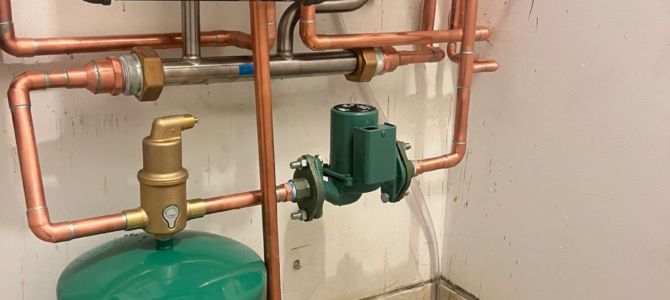
A pressure relief valve is an essential safety feature for your hot water tank. Heated water creates pressure, and if the temperature of the water or the pressure of the system goes over a safe threshold, the pressure relief valve opens to discharge hot water and steam. Without this vital safety mechanism, the tank could explode, leading to significant damage to your home or business.

The valve has a metal lever that snaps back and discharges steam or hot water into a drain tube. It’s important to test your valve regularly to make sure it’s working properly. If your valve is stuck open, or if it is constantly discharging hot water and steam, it may be time to replace the valve.

To do this, shut off the water supply to your water heater. Find the water heater’s discharge tube, usually located on the top of the water tank next to the cold water feed inlet. Place a bucket underneath the tube to catch the water that will drip from the discharge valve. Then, remove the inlet and outlet drain caps from the water heater isolator kit, and open both drain valves to release the pressure inside the tank. When the pressure inside the tank drops to a lower level, close the drain valve and close the inlet valve.

Then, with the power and water supply to your tank turned off, unscrew the valve from its opening using a wrench. Remove the old valve, and then screw in a new one with the same pressure rating as your current valve. Turn on the water supply and test the new valve. If it’s still leaking, you should call a repair service to replace the valve.

The burner assembly is an important part of the tankless water heater system, as it ensures the proper ignition and combustion of gas. If the burner assembly fails, the unit will be unable to heat up water on demand. This issue can be caused by a number of factors, including clogs, corrosion, and sediment. To troubleshoot this problem, it is essential to make sure that the gas supply is on and that the pressure is within specs. Also, ensure that the gas line is purged after installation.

The burning and combustion of fuel in the burner head of a tankless water heater is controlled by an igniter or flame sensor. If these components malfunction, the water heater will not turn on or may emit a smell of gas. It is possible to replace these parts, but it is best to leave this task to a professional.

Another common issue is a failure to ignite the pilot light. This can be solved by relighting the pilot or by adjusting the thermostat. If the unit still fails to ignite, it may be time to replace the pilot or the thermocouple. The cost of this repair varies depending on the water heater brand and model.

If you are experiencing these issues, it is important to call a qualified tankless water heater repair technician right away. They can fix the problem and restore hot water service to your home. In the meantime, you can try resetting the unit by ensuring that it is properly plugged in and that the circuit breaker or power switch is on. This will help prevent further damage to the unit and ensure that it is safe for use.

The air filter helps to keep bugs, dirt, and debris out of the unit. It needs to be cleaned or replaced regularly to keep it working properly. This task can be done by a homeowner, though it’s best to let a professional do it. This will ensure it is completed correctly and safely.

Another reason to schedule regular maintenance for your tankless water heater is to check the heat exchanger. A dirty heat exchanger can lead to leaking, rust, and other problems. It’s best to have a professional clean and inspect it on an annual basis to prevent these issues.

Sometimes, you’ll notice that you have cold water sandwiches while showering. This happens because someone else may have showered before you and used up all of the hot water in the tankless system.

When this occurs, the heat exchanger is trying to reheat your water but doesn’t have enough gas to do it. The result is that you get the dreaded cold water sandwich.

To prevent this from happening, make sure you switch the thermostat to “vacation” mode when you leave for long periods of time. This will prevent the heater from overworking and using up your gas. Also, you should have your professional drain and clean the water heater on an annual basis. This will remove any accumulated sediment and reduce the chance of damage or leaks. If you have a gas-powered unit, your technician will also inspect and adjust the gas pressure for optimal performance. This is also a good time to have your venting system checked for any obstructions or blockages that could be dangerous to you and your family. This is an important part of the maintenance process for all tankless water heaters, regardless of the type you have.

post

How Disaster Restoration Works

Disaster restoration companies provide specialized cleaning services after natural and man-made disasters. They also help property owners in insurance claim documentation and processing.

Disaster Restoration

Disaster restoration is a complex process, and it’s important to hire a company with experience in the industry. One Of A Kind Restoration helps streamline disaster restoration with low-code platform features like checklists and forms.

Disaster restoration is an essential part of recovery following natural disasters. This process restores homes, businesses, and other properties and helps people return to normal lives. However, many homeowners and property managers are not well-versed in how disaster restoration works, and as a result, they are often left scrambling to find information when disaster strikes. This can be costly, both financially and logistically.

Preparing for disaster restoration can be simple, but it must be done in advance. It is important to create a disaster restoration plan that includes the roles of each team member. It is also a good idea to conduct regular disaster preparedness training for your staff and service technicians. This can be done through regular professional seminars, in-house training sessions or even through hands-on workshops.

It is also important to understand the three phases of disaster recovery. The first is the response phase, which involves the immediate reaction to a disaster. This includes the protection of life and property, providing relief supplies, and conducting damage assessment. It is during this phase that a huge outpouring of donations from the community and voluntary agencies help to bring hope to affected individuals.

The second phase is the rebuilding phase, which usually lasts several years and involves re-establishing economic and social stability. This is when disaster survivors begin to regain their lives and re-establish their communities.

A key element of disaster restoration is restoring personal belongings. This can include furniture, cabinetry, millwork and more. This is important because it can save money on new replacements, as well as saving sentimental value for homeowners. In addition, expert restoration can often be done without destroying the items.

Another crucial component of disaster restoration is assessing and remediating mold. Mold growth can pose health risks, especially for those with allergies or asthma. Disaster restoration professionals will perform tests and conduct water damage inspections to identify any potential problems and take action accordingly. They can also provide air filtration systems and other remediation services. These steps can help to prevent mold and other environmental hazards from spreading throughout the property.

Assessment

When a disaster occurs, the first step in disaster restoration is often to assess the damage. This involves identifying what was affected, including where, when and how. It also includes determining what needs to be done to restore the property. A damage assessment may be conducted by a government agency or by private companies. It can take a long time to complete, especially after an event has occurred that disrupts communications and makes it difficult for teams to access areas where the damage is located.

Depending on the level of damage, a damaged assessment can be conducted at the individual, community or state levels. An individual damage assessment examines the physical condition of a home or personal belongings, while a community or state-wide assessment looks at the impact on infrastructure such as roads, bridges and public utilities. This information is important for determining eligibility for disaster recovery programs.

The disaster restoration process is a delicate balance between meeting client needs and minimizing liability. It is essential to establish clear company standards and best practices for conducting damage assessments. This will help you to create a consistent process and reduce the risk of miscommunication between team members. It is also crucial to use a low-code platform that can automate the process and speed up your work.

Disaster restoration requires a variety of skills and experience to ensure that buildings are structurally sound and safe for occupancy. A disaster restoration professional may also need to address issues such as water damage, smoke and fire damage, mold growth and other hazardous materials that could pose a health hazard. They will likely utilize advanced techniques to prevent further damage, restore the structure and ensure that it is a safe place for people to live.

In the days following a disaster, state, tribal and local governments will conduct an initial damage assessment (IDA) in order to determine whether they can request a federal disaster declaration. The IDA can be an Individual Assistance IDA or a Public Assistance IDA, and it must be completed within 30 days of the incident. FEMA has provided a variety of IDA survey templates that can be used to quickly collect and validate data.

Mitigation

Disasters cause widespread damage when they occur, which can result in everything from damaged homes and businesses to downed power lines. As a result, there’s a lot of debris that needs to be removed and dangerous chemicals and materials need to be properly disposed of. Restoration professionals work tirelessly to clean up after a catastrophe. However, many property managers and homeowners don’t understand how the disaster restoration process works. This is why it’s important for them to know what to look out for.

Hazard mitigation refers to the ongoing efforts at the federal, state and local level to lessen the impact of disasters. This includes preventing the loss of lives and property by keeping homes away from floodplains, engineering bridges to withstand earthquakes and creating and enforcing building codes that protect properties from hurricanes.

Stabilization is the first step in the disaster restoration process. The goal of this phase is to ensure that the affected area is safe for residents and workers. This can include removing hazardous materials, cleaning up fallen debris and securing dangerous equipment. It also involves establishing a chain of command and coordinating resources.

During this phase, a disaster restoration team will inspect the property for damage and identify priorities for recovery. They may need to remove contaminated soil from the site, perform mold testing and inspections of water damage and repair any structural damage that occurred.

In addition, the stabilization phase can also include providing temporary housing and food assistance for displaced people. This can be a huge benefit for those who have been forced to evacuate their homes during a natural disaster.

Disaster restoration can be a long and complicated process. It’s important for property owners and managers to partner with a company that has the experience, knowledge and resources to handle these types of emergencies. By doing so, they can rest assured knowing that their property is in good hands. Lastly, it’s important to keep in mind that it’s crucial to prioritize personal safety during a disaster. This includes seeking medical attention for any injuries or illnesses, if necessary.

Restoration

Disasters can be a devastating experience for homes and businesses, leaving behind severe damage that can seem overwhelming. But, the good news is that disaster restoration companies can help with the repair process and return damaged buildings to their pre-disaster condition. They are professionals in their field and can perform a wide variety of services. They can clean up sewage, restore water-damaged documents, repair electrical systems and more. Their main goal is to get you back on your feet after a disaster.

A specialized company will also know how to handle insurance claims after a disaster. They will be familiar with the documentation and reporting required for faster approvals, and they can even provide billing services to insured clients. They will also be able to assist you in developing priority lists for repairs and other tasks that need to be completed after the emergency is over.

After an initial assessment, the first step of disaster restoration is stabilizing the area. This includes securing the site, taking inventory of all damages and noting potential hazards such as fallen structures or downed power lines.

Once the site is stabilized, professionals can begin to restore the building’s interior. This includes repairing and cleaning up any water damage, conducting foundation inspections, performing mold testing and remediation as necessary, and making the building safe for occupancy.

As part of this step, it is critical to use personal protective equipment (PPE) such as protective suits, safety glasses and gloves. These products will protect the team members from harmful contaminants and debris during the restoration process. Tyvek coveralls are a good choice because they are made of low-static materials and block airborne particles, but are also breathable and comfortable to work in. Containment poles, such as Trimaco’s Heavy Duty E-Z Poles, are also a must for this step. They help create a confined and clean area for the recovery and renovation process and can be used with plastic sheeting to keep contaminants contained.

When choosing a disaster restoration service provider, look for one that communicates well with you and keeps you updated throughout the entire process. They should be available 24/7 and be able to address your concerns in a timely manner. A company that does not communicate with you or takes too long to respond can cost more money in the long run.

post

DIY Methods for Drain Cleaning

Drain cleaning is an important part of your plumbing maintenance. Many different products are available to unclog your drains, from chemical cleaners to natural, eco-friendly alternatives.

Drain Cleaning

For simple clogs, try a plunger or homemade drain cleaners made from baking soda and vinegar. For more serious blockages, you can use an acid drain cleaner but be sure to follow safety guidelines and protect your pipes.

A clogged drain is a household nightmare. Whether you’re trying to hop in the shower for your morning wake-up or get food prep done in the kitchen, having to wait for the water to flow down the drain can ruin your day and maybe even cause some water damage. But before calling a plumber, there are some DIY methods that can help you clear your drains.

The best way to clean a clogged drain depends on how and where the clog formed. For a sink or tub drain, pouring boiling water can often dislodge soap scum buildup and grease clogs. If the clog is in your drain trap, you may need to remove it and clean the entire thing.

There are a variety of tools that can help you with this task, including plastic drain cleaning strips and snakes. A wire hanger can also be used as a more rudimentary option, though you’ll want to use caution and be prepared for some grossness (think decomposing hair and gunk). Simply unwrap the end of the coat hanger and bend it into a small hook, then feed it down the drain. Once it hits the clog, wiggle it around and pull it up. This could take a bit of time, but will eventually break up and clear the clog.

Pouring baking soda and vinegar down your drain can also be a good solution for many clogs. Baking soda is alkaline and vinegar is a mild acetic acid, so when they mix, they react to create foaming action that can dislodge clogs. Mix an equal amount of table salt with the baking soda and pour it down the drain. After a few minutes, add two cups of boiling water down the drain and watch as the mixture flushes away your clog.

To keep your drains working properly, Calabrese recommends using a product like Bio-Clean once a month. It introduces a bacterial strain that will keep your pipes healthy while breaking up any gunk and preventing future blockages. You can purchase this product online or from a local hardware store.

Boiling Water

This is a simple and effective way to clear a clogged drain, particularly one involving hair. Fill a kettle and bring it to a boil, then slowly pour the boiling water down the drain in two or three stages, waiting several seconds between each pour so that the hot water has time to work on the gunk blocking the drain. You may need to repeat this process a few times before the drain is completely clear.

Another useful tip is to use boiling water in combination with baking soda and vinegar. This method is ideal for grease or soap clogs, as the hot water melts the grease and the baking soda works as a natural scouring agent forcing it out of the pipes. Pour a cup of boiling water down the drain, followed by a cup of baking soda and a half cup of white vinegar (it will fizz). Be sure to cover the drain opening to concentrate the cleansing reaction inside the pipe and then flush with more boiling water.

If you’re dealing with a tough clog, it’s possible that the problem extends further into the pipes. If this is the case, it’s best to call a plumber as chemical drain cleaners are more likely to damage your pipes than help them.

A professional can also help if the clog is caused by a broken pipe or sewer backup. In some cases, a plumber will need to snake the drain with a tool called a cable snake, which is essentially a long piece of flexible wire with a hook on the end that’s used to grab and pull the clog out of the pipe. A plumber can also use an auger to break up and remove a clog, but this method is more expensive.

If you’re not comfortable using a plumber, or the clog doesn’t seem to be going away, try a homemade plumbing snake made from a wire coat hanger. Straighten out the hanger as much as you can, then bend one end into a small hook. Fish that end down the drain, hooking onto any hair or gunk stuck in the pipes and pulling it out.

Baking Soda & Vinegar

Using baking soda and vinegar to clean your drain is an all-natural, inexpensive alternative to commercial drain cleaners. This simple hack is quick and easy, and you probably already have the ingredients at home. Plus, it’s much safer for your pipes than corrosive chemicals that can eat away at your pipes and cause chemical burns on your skin.

When you pour baking soda and vinegar down your drain, it creates a fizzing reaction that can break up small blocks of gunk in your drain. The mixture can also help deodorize your drains by destroying the bacteria that cause foul smells.

The only downside to this DIY solution is that it’s not effective for all types of clogs. For example, if your clog is caused by a large block of fat, it will likely take more than a fizzing mixture to dissolve it. You will need to use a drain snake or other tools to remove the blockage.

Another thing to keep in mind when using baking soda and vinegar is that the chemical reaction they create can damage your pipes if left unattended. The carbon dioxide gas produced by the reaction can build up and put pressure on your pipes, especially if you have older pipes made from copper or brass.

To avoid this problem, make sure to flush your drains with hot water after each application of baking soda and vinegar. You should also only use this method for minor clogs and not on a regular basis. Using this method too often can cause the material in your pipes to deteriorate, leading to future clogs and more expensive repairs.

If you are struggling with a major clog, it’s best to call a professional plumber instead of trying to fix the problem yourself. Professional plumbers will have the equipment needed to get your clog under control and prevent further problems down the road.

Call a Plumber

If your drains are clogged to the point where they are starting to smell, you will definitely want to call a plumber for professional drain cleaning. The clog may be caused by mold spores that grow in dark, damp areas. Regular drain cleaning can prevent a buildup of these spores, keeping your home fresh and clean.

A plumber will also be able to identify the cause of the clog. If it is a result of hair or soap scum, the plumber will be able to remove these things from the lines with ease. However, if the clog is caused by a broken pipe or sewer backup, they will need to use more advanced equipment to fix it.

You should also give the plumber a call when your drains are operating slower than usual. This could be a sign of an impending clog that isn’t going to resolve itself. A skilled plumber will be able to use specialized tools to get to the root of the problem and unblock your drains in no time.

Another sign that it’s time to call the plumber is if your toilet is overflowing or your shower is backing up into the tub. This is a serious issue that can put you and your family at risk of illness and bacteria.

Finally, if you have tried using household remedies like chemical drain cleaners or a plunger and the clog persists, it is time to call a plumber. These DIY solutions often only address the symptoms of a drain clog and can permanently damage your plumbing pipes. A plumber will be able to diagnose the cause of the clog and find a long-term solution that is safe for your plumbing system.

When drains are acting up, it is important to act quickly to avoid a bigger problem down the line. Don’t wait to call a plumber for drain cleaning, especially if it is that one annoying drain in your guest bathroom. A quick call to a local plumber can save you money, time, and frustration in the long run.

post

How to Unclog a Clogged Up Sink

If you have a clogged sink, you may have already tried a few home remedies to unclog it. The first method involves pouring vinegar or baking soda down the drain. Depending on the cause, you can use either white vinegar or apple cider vinegar. Then, take a stopper and insert it into the drain. Let it sit for 15 minutes. After that, flush the sink out with hot water.

If you cannot get to the root of the problem, you may want to call in a plumber to help you. They will be able to perform the task quickly and easily, and they will come to your home to help you fix your clogged sink. This solution requires safety equipment, so you will need to purchase protective gear. It is also best to soak the trap in boiling water overnight to avoid building up residue on it.

Another method is to use a mixture of vinegar and baking soda to loosen the clog. You can also pour some boiling water into the sink and leave it overnight. The resulting mixture will remove any residue that may be present. If you are not confident in your abilities, you can always call a plumber to fix your clogged sink. This option will save you a lot of hassle and time. And it will get the job done quickly.

There are also some home remedies that you can try. These include using a plunger and baking soda. Then, place a stopper over the sink for 5 minutes. When you have finished, run a full load of warm water to ensure that the water is draining properly. If the clog is due to a kitchen sink, you can use a pot of boiling water in the sink. You should wait at least an hour to see the results.

If the problem is not in the pipes, you can use a snake to unclog the sink. This tool is a coiled spiral that you bend down the drain and shake to loosen the clog. You can also use a metal coat hanger or other simple household item. A plumber’s snake can be a handy alternative to a stopper. Then, simply pour 4 cups of boiling water down the drain and check if it is working properly.

If the clogged sink is clogged in the trap, you can try cleaning the trap by pouring boiling water into it. You can also use a bucket to catch debris in the pipe. Then, run a bucket of water through the pipe to ensure it is free of debris. This method is effective but isn’t very long and may not work in some cases. It’s best to contact a professional plumber to get the job done.

If the problem is in the trap, it may be time to call a plumber to fix the clog. A plunger is a simple tool that is effective in unclogging the drain. It should be used for 30 seconds or until the water starts to swirl. If the water still doesn’t drain, repeat the procedure several times until the clog is fixed. In addition to the plunger, you can use boiling water to clean the trap.

If the drain is clogged in the trap, you can use boiling water and baking soda to break up the blockage. After you have completed the process, you can then rinse the drain with warm water and then repeat the process as necessary. Once the water drains, you can call a plumber to fix the clogged sink. If the clogged sink has soap or toothpaste waste, call a plumber. They will come out with these products and can solve the problem.

Another way to fix a clogged sink is to use vinegar or baking soda. Put the stopper over the sink and allow it to soak for five minutes. Make sure the water drains properly. If the drain is slow, you should call a plumber to unclog it for you. He can unclog it in no time at all. In addition to the chemicals, he can also offer you tips on how to prevent it in the future.