post

Types of Leak Detection Equipment

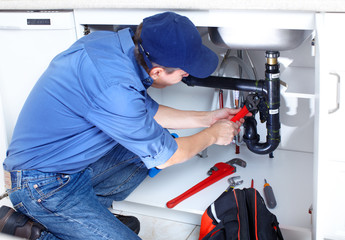
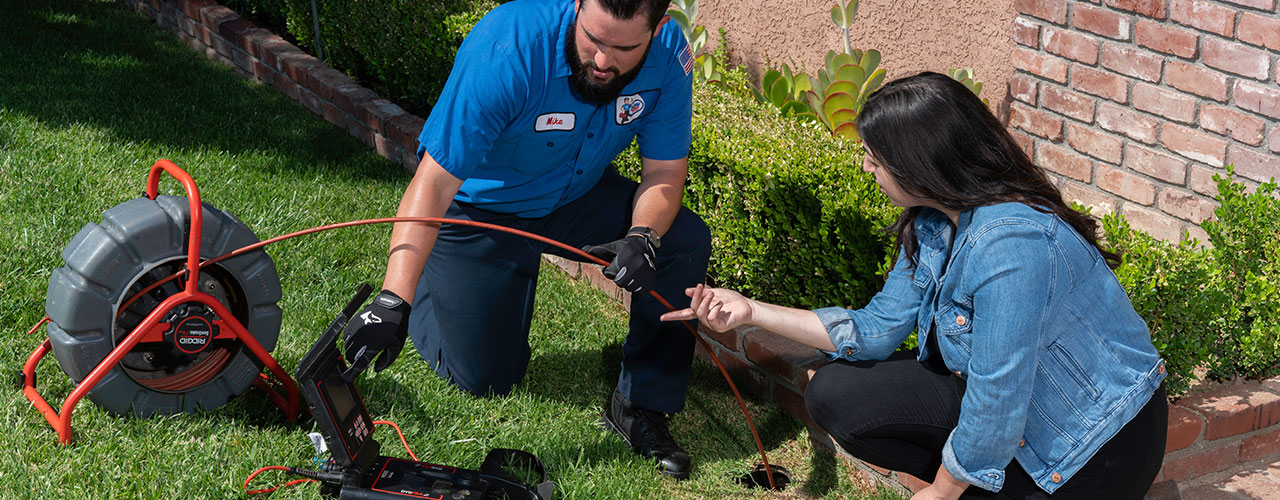
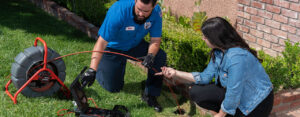
Leak detection is a non-invasive method of finding leaks that can save you money in the long run. It allows plumbers to see the problem without tearing up floors or breaking down walls.

Leak Detection

Many leaks are undetected and can cause extensive water damage. These leaks may be hidden behind walls, ceilings, or even underground. Visit Website to learn more.

Light detection and ranging (LiDAR) technology sends laser pulses that reflect off of objects, enabling precise measurements of distance that create 3D representations. This advanced technology finds wide application across numerous industries, including oil and gas, for mapping complex topography and monitoring changes caused by methane leaks.

LiDAR systems measure differences in the time it takes for a laser pulse to reach its destination from various points on or above the ground. This measurement of surface characteristics provides information that reveals features hidden below vegetation or obstructed by terrain, like buried pipes and conduits.

The resulting data is often a point cloud, a collection of individual data points arranged in three-dimensional space. The resolution of the point cloud determines how detailed the resulting map will be. A balance between resolution and accuracy must be struck, with the ideal varying depending on the specific requirements of each project.

A LiDAR system’s scanning mechanism is another determinant of its performance and ability to capture quality data. Mechanically operated systems use spinning mirrors or other components to direct laser beams, and they’re typically used to scan larger areas with higher resolutions. Their complexity and mechanical components, however, can introduce points of failure into the data.

LiDAR’s ability to penetrate dense forest canopies is useful in many ways for conservationists, but it also gives rise to a host of new opportunities for companies that depend on the world’s forests, like paper, syrup and furniture production. LiDAR allows forestry professionals to quickly and accurately map miles of forest, speeding up traditional surveying and saving valuable resources.

Other uses for LiDAR include monitoring methane emissions in natural gas pipelines. In these applications, drone-mounted LiDAR sensors identify potential methane leaks and can help optimize field crew deployment. By leveraging GPS coordinates, LiDAR can save crews the expense and safety risks of traveling to 60% to 90% of all sites on foot, while still ensuring accurate methane reduction tracking.

Additionally, the information provided by LiDAR can be analyzed to identify contaminants in air or water. This analysis is made possible by tunable lasers, which emit specific frequencies that can be detected by the sensor. The precise chemicals that can be identified by DIAL will vary, but the list is expected to grow as reliable tunable lasers become more widely available.

Acoustic Leak Detectors

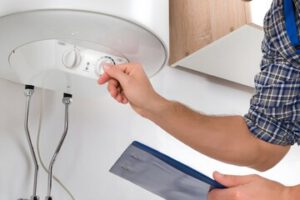
In pressurised water lines, leaks create a distinctive hollow sound that can be heard by experts using specialised listening devices. These devices are commonly known as “listening sticks” or acoustic detectors, and are used by professional plumbers to locate the location of leaking pipes without digging or tearing open walls or floors.

Acoustic leak detection is an effective tool for avoiding costly repairs, water loss, and disruption to service. In addition, it is also an environmentally friendly alternative to traditional trial-and-error methods such as digging or cutting into a wall or pipe.

Depending on the system being monitored, acoustic leak detection technology can provide real-time monitoring, sending an immediate alert when a potential issue is detected. This allows appropriate actions to be taken immediately, including shutting down systems or isolating the affected area and arranging for repairs.

In addition to an immediate alarm, some acoustic leak detection technologies offer advanced features like frequency analysis and data logging capabilities. These can help technicians pinpoint the exact location of a leak with great accuracy and reduce the chance of false positives or negatives. For example, by utilising noise cancellation techniques or deploying sensors overnight, where ambient noise is less prominent, technicians can improve the likelihood of detecting leak sounds and determining their exact location.

Acoustic leak detectors can be deployed at the surface level, or dropped into manholes for inspection and location of leaking pipes underground. They can be used for any type of pipe material, and can be particularly effective on buried steel or cast iron transmission mains that may produce very faint leak noises.

The sound produced by a leaking pipe is a low, baritone tone with a very distinctive hollow, vibrating quality. The acoustic technology used to detect these leaks is extremely sensitive and works by recording the sound of a leak and using digital instrumentation to isolate and amplify it. This enables experts to pinpoint the precise location of the leak, saving time and money that would be lost through trial-and-error methods. In conjunction with leak correlation, acoustic detectors can provide valuable information on the condition of an entire pipeline system, enabling the utility to manage and schedule repairs accordingly.
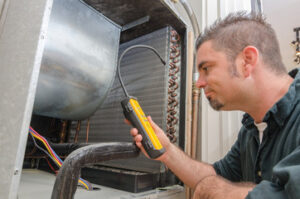
Infrared Cameras

An infrared camera detects invisible light that exists outside the range of visible light. The camera converts these frequencies into a thermal image on its screen or viewfinder that displays differences in surface temperatures. These temperature variations can be harbingers of hidden water leaks, which can result in structural damage, mold development and other health hazards. Infrared cameras are ideal for detecting moisture and identifying sources of condensation and other potential problems.

IR camera systems work in the near-infrared (NIR) electromagnetic spectrum that lies between visible light and X-rays on the electromagnetic spectrum chart. They are not designed to see through walls or other solid objects, but rather to measure the infrared radiation reflected off those surfaces and structures. There are special sensors available that cover different portions of the NIR spectrum: short-wave infrared (SWIR) for the lowest frequencies, long-wave infrared (MWIR) for medium-range applications and the extended MWIR which covers a larger area than MWIR but doesn’t go all the way to the IR spectra of CO2 molecules that tend to attenuate light a lot more in that region.

The camera’s detector chip contains thousands of pixels arranged in a grid. Each pixel responds to the infrared energy focused on it and produces an electronic signal that is processed by the camera’s circuitry. That signal is then translated into a temperature map with each individual pixel showing its own apparent temperature value in a matrix of colors. The camera’s display then shows the resulting image with warmer areas appearing as brighter or lighter colors and cooler areas displayed as darker shades.

Important preparatory steps should be taken prior to using an infrared camera for leak detection. First, make sure the area is dry and clear of anything that might interfere with the camera’s ability to accurately measure heat. Then, read the camera’s user manual to get familiar with its features and capabilities. It’s also helpful to take digital photos of the problem area and include them with the thermal images to help identify the location of a leak. In addition, the IR PhotoNotes feature on Fluke’s IR camera system allows users to store voice or written notes with each photo for future reference.

Moisture Meters

Moisture meters provide an instant and non-invasive readout of a surface’s moisture level, making them ideal for inspecting new homes, identifying dry lumber, and pinpointing water leaks. These devices emit a low-frequency electrical signal, which the material absorbs. The instrument then measures the variation of wave characteristics created by the absorbed energy, which in turn reflects the material’s moisture content. Moisture meters can detect moisture in a variety of materials, including wood, plaster, and carpet.

Pin-type and pinless models are available for use in a wide range of building materials. Depending on the model you choose, the device may be capable of measuring moisture at varying depths. Many of these devices offer the option to attach a probe to allow you to insert the meter into a hole in the wall for more detailed testing.

A pin-type moisture meter has two to four sharp, high-precision stainless steel pins that penetrate the surface of the test material. The meter uses the pins to create an electronic current that causes the probes to change in response to the material’s moisture level. The meter’s sensor pad then evaluates the changes in the wave pattern reading to calculate the resulting moisture content of the tested material.

In contrast, pinless meters do not leave any indentations on the surface they are testing. These models utilize a sensor plate that transmits an electromagnetic signal, which is then evaluated by the meter. The resulting variation in the readings is compared to those of dry materials to determine a moisture level.

Both types of moisture meters are generally easy to operate, even in the dark. Most are calibrated to measure the moisture content of wood and include visual LED indicators that display a percentage of a dry, moderate, or saturated measurement. Some moisture meters can also be used for testing concrete and gypsum, but their sensitivity levels are often lower than for wood.

A moisture meter can help you identify the source of a leak by following the highest moisture readings in the area. In many cases, these readings will show the area of the leak and can help you determine if it is a problem with plumbing, roofing, or other structural components.

The Importance of a Plumbing Service

Prescher Plumbing Service keep your home’s water pipes clean and prevent leaks. They also help you save money on your energy bill by ensuring efficient water flow. They can detect and repair gas leaks, too.

Plumbers can fix clogged drains and toilets, replace water valves, and hook up appliance water lines. They can also remodel bathrooms and install water heaters.

The plumbing system is an important part of your home, and maintaining it properly is essential. Regular plumbing services can help you avoid costly repairs and replacements and improve the overall function of your home’s fixtures and appliances. A well-maintained plumbing system can also increase the value of your home.

When you hire a professional plumber, you can expect quality work that lasts. Professional plumbers use high-quality materials and tools to fix problems quickly and efficiently, and they can provide a wide range of services, from drain cleaning to water heater installation. Plus, they can offer advice on maintaining your plumbing system so it doesn’t break down in the future.

If you have a long-term relationship with a plumber, scheduling services is easier and more convenient. The plumber will know your history with the company and can recommend services that are tailored to your needs. They can also offer discounts or rebates to loyal customers. And if you’re concerned about the environment, many plumbing companies specialize in green solutions, like water-efficient fixtures and sewer line inspections.

In addition to clogged drains and leaky faucets, plumbing issues can be caused by many other factors. These include poor water pressure, rusty pipes, and even tree roots. To prevent these problems, a professional plumber should regularly inspect your home’s plumbing. They can identify and repair issues before they become major problems and save you money in the long run.

A good plumbing service can make all the difference in your home’s comfort and safety. Choosing a licensed and experienced plumber is important to ensure the job is done correctly and safely. Also, look for one that offers emergency services so you can call them whenever needed. Finally, supporting local businesses is a good idea, as they tend to be more trustworthy than national chains. Besides, they will better know your area’s plumbing systems and infrastructure. This will ensure a faster and more effective service. Plus, you’ll feel good knowing that you’re supporting your community.

A plumbing service is necessary for maintaining the water systems in residential and commercial spaces. From fixing leaky pipes to unclogging drains, these professionals have the skills and equipment to handle various tasks. They can also provide preventative maintenance, such as cleaning drains and inspecting water heaters.

Leaking pipes and clogged drains can lead to health problems, including mold and fungus. These issues can be costly to repair, so it is important to have a plumbing service visit your home regularly. In addition, a well-maintained plumbing system will operate more efficiently, saving you money on your water bill.

A backed-up sewer line is one of the most common reasons for a plumbing problem. This can cause overflowing toilets and other water-related issues. In addition, it can also pose a health risk for you and your family. Call your local plumber immediately for fast and reliable services if you notice a backup.

Licensed plumbers have the training and experience to diagnose and fix any plumbing issue quickly. They can also recommend cost-effective solutions to save you money in the long run. Plus, they’re insured to protect you in an accident during a job.

Customer satisfaction is key to building a solid reputation in the plumbing industry. It can be achieved by providing transparent and clear communication, dependable service, and fair pricing. In addition, offering value-added services and flexible payment options can help you attract more clients and increase customer retention.

Plumbing issues often arise unexpectedly and need to be addressed immediately. That’s why it’s important to find a plumber who is available around the clock and can respond to your calls promptly. In addition, a plumber who is licensed and insured will be able to address your concerns in a safe and timely manner.

Before your plumber arrives, clear where they will be working and remove any items that may obstruct access to your plumbing fixtures, this will ensure they can work safely and efficiently and minimize disruption to your daily life.

Plumbing services include installing, repairing, and maintaining pipes, fixtures, and other components that form a home’s water supply system. A well-maintained plumbing system ensures clean drinking water and proper waste management. Professional plumbers are trained to diagnose problems and provide permanent solutions. They can also fix leaks, clogged drains, and water heater problems. They can install water filtration systems, as well as conduct routine inspections and maintenance to prevent potential issues from arising.

When looking for a plumber, look for one with a good reputation and extensive experience. You should also ensure the plumber is licensed and insured, indicating they have met minimum industry standards. It is also a sign that the plumber values professionalism and integrity and will take care of your home as if it were theirs.

Choosing a plumber with a good reputation will ensure you get quality work at a fair price. Look for online reviews and customer feedback to see what other customers have had to say about their experiences with the company. It would be best if you also asked for references from past clients. A reputable plumbing company will gladly provide you with a list of references upon request.

Plumbing companies should always be available to answer your questions and concerns. They should also be able to schedule appointments quickly and efficiently. Moreover, they should have the tools and equipment needed to complete the job in one visit. A reputable plumber will also provide you with a warranty or guarantee on their work.

In addition to providing high-quality plumbing services, a reliable plumbing company will also offer you emergency services. This will help you avoid expensive damages caused by leaking or overflowing water. Moreover, it will save you time and money by eliminating the need to visit a hardware store. In addition, it will ensure that you have a safe and functional water system for years to come. Therefore, if you are facing any plumbing emergencies, call a professional plumber as soon as possible.

Plumbers are trade professionals who install, repair, and maintain pipes and fixtures that carry water, steam, and chemicals. They also inspect and test plumbing systems to ensure they meet local codes. Some plumbers specialize in specific fixtures, while others work on whole-house piping networks. They also may design and lay out plumbing systems for new constructions and renovations.

A well-maintained plumbing system is essential for a home or business to function properly. It brings clean water into the house and removes waste without causing leaks or sanitation issues. Regular maintenance and repair can prevent costly repairs later on. A good plumber will have experience working on a wide range of plumbing problems and will know how to troubleshoot quickly and effectively.

Experienced plumbers are familiar with local plumbing code requirements and can get the job done right the first time. They also use non-intrusive methods and technologies to limit damage to your property. They are also skilled at repairing fixtures, including sinks, toilets, bathtubs, and showers. They are also qualified to repair garbage ejector outlets and other specialty items.

Plumbing services are a critical part of any home renovation project. From designing the pipe network to installing new fixtures and appliances, a professional plumber can make the process smooth and stress-free. They can also help homeowners navigate complex building codes and regulations. This is especially important for older homes with outdated or non-compliant plumbing.

A quality plumbing service will be available around the clock and can respond to calls quickly. They will also be able to handle emergencies, such as clogged toilets and sewer line backups. A plumber with experience can diagnose the problem and recommend the best solution.

A skilled plumber can work with various materials, including copper, PVC, PEX, and galvanized steel. They will also be able to work in tight spaces and small corners. They should be able to understand complex technical drawings and follow instructions. They should also have excellent customer service skills and be able to communicate clearly.

post

Water Heater Installation Techniques

Hooking up a new water heater requires a lot of moving parts. A licensed plumber can install your new water heater safely, according to local codes.

Water Heater Installation

Working on an energized circuit can cause severe injury or death from electrical shock. Make sure the power is off before starting any work. Contact Water Heater Installation Denver for professional help.

The first step in installing a water heater involves collecting the necessary tools and materials. This includes the new water heater itself, as well as plumbing supplies and power tools such as a pipe wrench, pliers, copper tubing, Teflon tape, a voltage tester, a drill, and a hacksaw. It is also a good idea to have some steel wool on hand, as it can be used to clean up any excess debris that may be on the pipes before soldering them.

Before beginning any work, shut off the gas and water supply valves to the old hot water heater, and make sure that the water is fully drained from the existing pipes. This can help prevent scalding while you are working on the new installation, as well as helping to reduce the risk of accidental leaks around the new system.

Once the old water heater is disconnected, turn off the electricity to the unit. If there is a junction box cover on the hot water heater, remove it to expose the electrical wiring connections. Before connecting any wires, carefully read the printed installation instructions and safety warnings on the tank. You should also familiarize yourself with any local building codes or regulations that might apply to your particular installation.

You will need to connect the new water heater to the existing pipes. If you are using copper pipes, it’s a good idea to solder elbow joints onto one end of each pipe. This will help prevent leakages and allow you to connect the pipes securely, without needing to use a wrench. You should also consider installing insulation on the pipes, especially if they are located in an uninsulated area of your home.

When making the gas pipe connections, it is important to follow the manufacturer’s instructions and use a thread sealant designed for gas lines. It is also a good idea to install a sediment trap on the gas line going into the new water heater, as this can help protect the unit from mineral deposits. Once all of the connections are made, you can replace the junction box cover on the water heater.

Venting

A vent is a hole or passage through which smoke, gas or odors escape. A vent is also a way to express one’s feelings: She telephoned her best friend to vent about the latest happenings.

A new water heater needs a proper venting system to safely release combustion fumes and excess water out of the house. The venting requirements are different for gas and electric models. Gas models use natural or propane gas and rely on the building’s existing gas line to power the burner. Electric models use electricity to power the heater’s heating elements and depend on a dedicated circuit to run the pump. Depending on the model and your home’s current piping setup, the cost of installing a new gas or electric venting system may be $500 to $2,500.

The vent pipe must extend from the gas valve (Photo 6) to the outside and up through the roof. The vent should rise at least 12 in. before turning at the first elbow, and the pipe should be sloped to drain. To test the draft, close all doors and windows and move a lit match around the edge of the flue. If the flame flickers and fumes aren’t drawn up the vent pipe, the chimney is blocked or the ventilation system doesn’t work. Call a licensed plumber to fix the problem.

Many localities require that the venting system be changed from an atmospheric vent to a direct vent. In this system, a double-chambered pipe carries gases out of the house while fresh air is allowed in. It’s usually more expensive to install this system, and it can be challenging to do so in an existing home without modifying the structure’s plumbing.

After the venting is finished, turn off the gas at the valve near the water heater. Shut off the main water supply as well and drain the water by opening a faucet on the lowest floor. Next, connect the new temperature and pressure relief valve to the gas line by coating its threaded ends with pipe joint compound and screwing on the first nipple. Coat the remaining nipples with more compound and screw them on with pipe wrenches, then replace the vent hood.

Electrical

If the new water heater is an electric model, you need to have a professional electrician install a new circuit breaker and run a cable (2-pole, 30-amp breaker with 10-2NM cable) from the power source to the tank. This is typically done outside of the home and requires some carpentry work (if necessary). If your water heater uses gas, it will need a new natural or propane gas line to be run to the appliance. A professional plumber will need to make these connections as well.

If you have copper pipes that you need to cut for the water heater installation, clean them with sandpaper cloth and prepare them for soldering by applying a layer of pipe thread compound to each end. This will help ensure that the piping is properly sealed and will prevent leaks down the road. It’s also a good idea to have the professionals install a new hot water shut off valve at the water heater and a cold water shut off valve in your home, so you can easily turn off your water supply for maintenance without having to shut off your entire home.

Once the water lines are prepared, turn off the power to your water heater by turning off the circuit breaker that’s marked “water heater.” Turn off the gas if you have a gas-powered model and drain the old tank before removing it from the area.

Then, disconnect the electrical wires from the junction box at the top of the water heater by removing the plastic cover and insulation. Identify the black and white circuit wires by looking at their coloring or the label tags on the water heater. The white wire is the “hot” wire, while the black wire is the “neutral” wire. Connect the wires to each other using wire connectors and attach them to the grounding wire on the junction box. Use your label tag or a picture of how the wires were connected to help you remember where each one goes. Replace the junction box cover and insulation.

After the new water heater is in place, reconnect the wires by following your labels or the photos you took of the original connections. Connect the grounding wire to the green ground screw and replace the junction box cover. Once everything is in place, it’s time to turn the power back on and test your new water heater.

Installation

It’s important to work with a professional plumber on any water heater installation project. Not only can they ensure that your new system is installed correctly, but they can help you figure out which model and type of water heater is best for your home. This process involves figuring out how much hot water you use during peak times, so that you can choose an appropriately sized unit.

After removing the old water heater, make sure that the drainage pipe is connected to a drain pan. It’s also a good idea to install a new temperature and pressure relief valve on the drain line. This is an important safety feature, and it’s required by local plumbing codes.

Once the plumbing connections are made, you can connect the new water heater to the water lines and the electric power wires (if it’s an electric unit). Make sure that the drain valve is open and closed before switching on the water. It’s a good idea to install a manual shutoff valve before and after the heater as well. This will allow you to shut off the water supply to the heater for repairs or maintenance without having to shut off your whole house.

To make the connection, wrap the threads on two galvanized plastic-lined nipples with plumber’s tape and screw them onto the cold water inlet and hot water outlet openings on the top of the heater. Alternatively, you can prepare new pipe assemblies by cutting two lengths of copper pipe and soldering them together. To prevent the pipes from collapsing, you can use FIP adapters.

Before connecting the electrical cables, remove the cover from the electrical junction box on the top of the water heater and disconnect the wire connectors and cable clamp from the two power wires. You may need to use a cable cutter and tubing cutter to disconnect the pipes.

If the water heater is gas, you’ll need to disconnect the draft hood and cut the vent pipe from the top of the heater. You’ll also need to disconnect the gas control valve on the gas line by using a pipe wrench or channel-lock pliers.

post

How Disaster Restoration Works

Disaster restoration companies provide specialized cleaning services after natural and man-made disasters. They also help property owners in insurance claim documentation and processing.

Disaster Restoration

Disaster restoration is a complex process, and it’s important to hire a company with experience in the industry. One Of A Kind Restoration helps streamline disaster restoration with low-code platform features like checklists and forms.

Disaster restoration is an essential part of recovery following natural disasters. This process restores homes, businesses, and other properties and helps people return to normal lives. However, many homeowners and property managers are not well-versed in how disaster restoration works, and as a result, they are often left scrambling to find information when disaster strikes. This can be costly, both financially and logistically.

Preparing for disaster restoration can be simple, but it must be done in advance. It is important to create a disaster restoration plan that includes the roles of each team member. It is also a good idea to conduct regular disaster preparedness training for your staff and service technicians. This can be done through regular professional seminars, in-house training sessions or even through hands-on workshops.

It is also important to understand the three phases of disaster recovery. The first is the response phase, which involves the immediate reaction to a disaster. This includes the protection of life and property, providing relief supplies, and conducting damage assessment. It is during this phase that a huge outpouring of donations from the community and voluntary agencies help to bring hope to affected individuals.

The second phase is the rebuilding phase, which usually lasts several years and involves re-establishing economic and social stability. This is when disaster survivors begin to regain their lives and re-establish their communities.

A key element of disaster restoration is restoring personal belongings. This can include furniture, cabinetry, millwork and more. This is important because it can save money on new replacements, as well as saving sentimental value for homeowners. In addition, expert restoration can often be done without destroying the items.

Another crucial component of disaster restoration is assessing and remediating mold. Mold growth can pose health risks, especially for those with allergies or asthma. Disaster restoration professionals will perform tests and conduct water damage inspections to identify any potential problems and take action accordingly. They can also provide air filtration systems and other remediation services. These steps can help to prevent mold and other environmental hazards from spreading throughout the property.

Assessment

When a disaster occurs, the first step in disaster restoration is often to assess the damage. This involves identifying what was affected, including where, when and how. It also includes determining what needs to be done to restore the property. A damage assessment may be conducted by a government agency or by private companies. It can take a long time to complete, especially after an event has occurred that disrupts communications and makes it difficult for teams to access areas where the damage is located.

Depending on the level of damage, a damaged assessment can be conducted at the individual, community or state levels. An individual damage assessment examines the physical condition of a home or personal belongings, while a community or state-wide assessment looks at the impact on infrastructure such as roads, bridges and public utilities. This information is important for determining eligibility for disaster recovery programs.

The disaster restoration process is a delicate balance between meeting client needs and minimizing liability. It is essential to establish clear company standards and best practices for conducting damage assessments. This will help you to create a consistent process and reduce the risk of miscommunication between team members. It is also crucial to use a low-code platform that can automate the process and speed up your work.

Disaster restoration requires a variety of skills and experience to ensure that buildings are structurally sound and safe for occupancy. A disaster restoration professional may also need to address issues such as water damage, smoke and fire damage, mold growth and other hazardous materials that could pose a health hazard. They will likely utilize advanced techniques to prevent further damage, restore the structure and ensure that it is a safe place for people to live.

In the days following a disaster, state, tribal and local governments will conduct an initial damage assessment (IDA) in order to determine whether they can request a federal disaster declaration. The IDA can be an Individual Assistance IDA or a Public Assistance IDA, and it must be completed within 30 days of the incident. FEMA has provided a variety of IDA survey templates that can be used to quickly collect and validate data.

Mitigation

Disasters cause widespread damage when they occur, which can result in everything from damaged homes and businesses to downed power lines. As a result, there’s a lot of debris that needs to be removed and dangerous chemicals and materials need to be properly disposed of. Restoration professionals work tirelessly to clean up after a catastrophe. However, many property managers and homeowners don’t understand how the disaster restoration process works. This is why it’s important for them to know what to look out for.

Hazard mitigation refers to the ongoing efforts at the federal, state and local level to lessen the impact of disasters. This includes preventing the loss of lives and property by keeping homes away from floodplains, engineering bridges to withstand earthquakes and creating and enforcing building codes that protect properties from hurricanes.

Stabilization is the first step in the disaster restoration process. The goal of this phase is to ensure that the affected area is safe for residents and workers. This can include removing hazardous materials, cleaning up fallen debris and securing dangerous equipment. It also involves establishing a chain of command and coordinating resources.

During this phase, a disaster restoration team will inspect the property for damage and identify priorities for recovery. They may need to remove contaminated soil from the site, perform mold testing and inspections of water damage and repair any structural damage that occurred.

In addition, the stabilization phase can also include providing temporary housing and food assistance for displaced people. This can be a huge benefit for those who have been forced to evacuate their homes during a natural disaster.

Disaster restoration can be a long and complicated process. It’s important for property owners and managers to partner with a company that has the experience, knowledge and resources to handle these types of emergencies. By doing so, they can rest assured knowing that their property is in good hands. Lastly, it’s important to keep in mind that it’s crucial to prioritize personal safety during a disaster. This includes seeking medical attention for any injuries or illnesses, if necessary.

Restoration

Disasters can be a devastating experience for homes and businesses, leaving behind severe damage that can seem overwhelming. But, the good news is that disaster restoration companies can help with the repair process and return damaged buildings to their pre-disaster condition. They are professionals in their field and can perform a wide variety of services. They can clean up sewage, restore water-damaged documents, repair electrical systems and more. Their main goal is to get you back on your feet after a disaster.

A specialized company will also know how to handle insurance claims after a disaster. They will be familiar with the documentation and reporting required for faster approvals, and they can even provide billing services to insured clients. They will also be able to assist you in developing priority lists for repairs and other tasks that need to be completed after the emergency is over.

After an initial assessment, the first step of disaster restoration is stabilizing the area. This includes securing the site, taking inventory of all damages and noting potential hazards such as fallen structures or downed power lines.

Once the site is stabilized, professionals can begin to restore the building’s interior. This includes repairing and cleaning up any water damage, conducting foundation inspections, performing mold testing and remediation as necessary, and making the building safe for occupancy.

As part of this step, it is critical to use personal protective equipment (PPE) such as protective suits, safety glasses and gloves. These products will protect the team members from harmful contaminants and debris during the restoration process. Tyvek coveralls are a good choice because they are made of low-static materials and block airborne particles, but are also breathable and comfortable to work in. Containment poles, such as Trimaco’s Heavy Duty E-Z Poles, are also a must for this step. They help create a confined and clean area for the recovery and renovation process and can be used with plastic sheeting to keep contaminants contained.

When choosing a disaster restoration service provider, look for one that communicates well with you and keeps you updated throughout the entire process. They should be available 24/7 and be able to address your concerns in a timely manner. A company that does not communicate with you or takes too long to respond can cost more money in the long run.

post

How to Become a Plumber

Plumber Sarasota installs and repairs systems that provide water, waste, gas, and heat in residential and commercial settings. They interpret blueprints and building codes to plan plumbing installations and repair existing ones. They also fix fixtures and appliances like taps, toilets, showers, and sinks.

Plumber

If you’re interested in becoming a plumber, you can take a college course or an apprenticeship program that combines educational hours and on-the-job training. These programs typically last four to five years.

The cost of hiring a plumber can vary significantly depending on the job type and your location. For example, plumbers in major cities typically charge more than those in smaller towns. The cost of materials also affects the price. Plumbers often mark up their supplies by 5% to 20%, which is why they charge more than the wholesale price for items like toilets and pipes. In addition, the cost of labor can also vary. Some plumbers charge by the hour, while others charge a flat rate per job. In addition, many plumbers charge a service call fee to cover travel expenses and the time spent diagnosing a problem.

Plumbers install, maintain and repair a variety of plumbing systems in homes and commercial buildings. Their responsibilities include inspecting existing pipe work, testing water pressure, locating leaks, and fitting replacement parts such as valves and taps. They can also repair drains and sewer lines, replace bathtubs and showers, and install heating systems.

A plumber’s responsibilities may include interpreting building codes and regulations, reading blueprints, and pulling permits for plumbing projects. They often perform inspections to ensure that their work meets code requirements and complies with local, state, and federal laws. They also troubleshoot dysfunctional plumbing systems, and they sometimes cut holes in walls and floors to install new pipes or fixtures.

Plumbing jobs can be complex and require special equipment or skills. The more complex the project, the higher the cost. For instance, repiping a whole house can be expensive and requires digging a trench to remove and replace old pipes. Plumbers also have to pay for tools, overhead, and insurance. Some plumbers have union dues, which can add up to a significant amount of money.

The average plumber salary is $45 to $150 per hour, including the cost of materials and trip fees. The cost of plumbers may vary depending on experience, location, and the type of job. Plumbers with extensive training and years of apprenticeship are more expensive than those with little or no experience.

There are a few routes to becoming a plumber, including taking courses at a vocational school, working as an apprentice, or joining a trade organization. Most states require plumbers to have a valid license. To obtain a license, you must complete an exam and pass a background check. You can find information about licensing requirements in your state’s website or by contacting your local occupational safety and health agency.

Work environment

Plumbing is a physically demanding trade, and it requires significant amounts of hands-on work. It is also an extremely rewarding career for those who are interested in a challenging and varied day-to-day job. It is relatively easy to get into as there are many plumbing companies that offer entry-level positions, and apprenticeships are a popular option for those looking to gain on-the-job knowledge and training while earning a salary. Once a plumber is skilled enough, they can work as a journeyman plumber or even start their own plumbing company.

A plumber’s work environment varies depending on the type of plumbing they do. They may work on systems in homes, commercial buildings, or industrial facilities. These systems are used for delivering and collecting water and sewage, and they must meet specific codes and regulations. Plumbing contractors often collaborate with architects and construction teams to ensure that plumbing is integrated seamlessly into building projects. They may also need to read and interpret blueprints, prepare and cut pipe materials, and use and maintain various tools.

In residential settings, plumbers work directly with homeowners and tenants to resolve plumbing issues. This can be challenging, as it is often necessary to work in tight spaces like crawl spaces and basements. In addition, plumbers may need to deal with unpleasant material found in drains and pipes. They also must be comfortable working around electricity and other dangerous equipment.

Plumbers who work on large-scale plumbing projects in commercial and industrial settings often travel to different locations each day. They may spend time in office buildings, restaurants, hospitals, or factories. They must be able to work in tight spaces and sometimes work outside in poor weather. In addition, they must be able to read and interpret blueprints and plans in order to ensure that their plumbing installations comply with building codes and regulations.

Plumbers are often on call when a customer has an emergency, so they must be willing to work late hours or on weekends when needed. They also must be able to work on their own or in a team, and they must have the ability to solve problems with minimal supervision. Some plumbers are self-employed, which allows them to set their own schedule.

Education and training

Plumbing school programs offer streamlined training in one of the most sought-after trades. They usually involve a combination of classroom instruction and on-the-job training, and are generally less expensive than attending a community college or trade school. They also often give students the opportunity to take business courses, which can be useful for those who plan to own their own businesses someday. Whether you are looking for a way to get into the trades or simply want to improve your skills, plumbing school can help you become a licensed plumber.

Many people choose to become a plumber because of the good pay and the job security. Unlike other jobs, you will not be at risk of losing your job if the economy declines. Moreover, the skills you gain can be transferred to other industries. Besides, you will be able to enjoy working with people, since plumbing involves visiting different homes and meeting new clients on a daily basis.

To become a plumber, you need to complete a trade school program or apprenticeship. These programs typically last four to five years and include both classroom learning and on-the-job experience. They teach students the basics of plumbing, including pipes, fixtures, water heaters, and heating systems. They also learn to read blueprints and perform safety checks.

Plumbers are also required to keep up with industry changes. They can do this by taking continuing education classes, or by completing a higher degree in a field like engineering. Some plumbers even become instructors at local schools, to pass on their knowledge and skills.

Another advantage of becoming a plumber is the fact that it will allow you to make money quickly. Most plumbers earn a comfortable living and can start their own companies after they have earned enough experience. You can even join a union, which offers excellent benefits and health insurance. Besides, you will have an opportunity to work as an independent contractor and be your own boss. This is an excellent option if you’re tired of the 9-to-5 grind. You will be able to travel and meet new people on a daily basis, while making a decent income.

Job outlook

Many people don’t think of a career as a plumber as one that is particularly “prestigious.” While it is true that this occupation does not involve wearing a suit and hosting fancy corporate events, it does provide a valuable service to the public. Plumbing is one of the essential services that allows billions of people to live and work in comfortable conditions. It also ensures that clean drinking water is available for all of us.

Plumbing is a highly diverse line of work. In addition to repairing pipes and installing fixtures, plumbers must have a strong understanding of physics and fluid dynamics to troubleshoot problems. They must also be able to read and design blueprints to determine the placement of pipes. These diagrams help to ensure that a structure’s plumbing meets building codes and works well with other features, such as electric wires. In addition, a plumber may have to work with a team of construction specialists and project managers to ensure that a commercial or industrial project is completed on time.

The job outlook for a plumber is better than that of most other occupations. According to the Bureau of Labor Statistics, the number of plumbing jobs is expected to grow by 5% between 2020 and 2030, with an average of 51,000 new openings per year over this decade. This growth is due to new construction projects and the need for repairs in existing homes and businesses.

In order to succeed as a plumber, you must be comfortable working with your hands and being physically active for long periods of time. It is also important to have a high level of manual dexterity and analytical thinking. You must also be willing to work hard and meet deadlines. Lastly, you must be willing to travel to different locations and work in a variety of environments.

Another way to improve your chances of employment as a plumber is by joining a professional association. These organizations can provide you with the education and resources you need to advance in the field. Additionally, they can connect you with other plumbers and trade professionals who can offer advice and guidance.

post

Things You Can Do to Save From Heating Bills

With two major snowstorms sweeping the nation and inflation pushing energy prices to record highs, heating bills are rising. Fortunately, there are many things you can do to save on your heating bill.

For example, you can save on your heating bill by keeping curtains open during the day to allow sunlight to stream in and then closing them at night to trap the heat.

heating

Insulation is one of the most important home improvements to reduce energy bills. The material prevents heat loss during the cold months and enables your heating system to work less often. It helps maintain a constant temperature throughout the house, so you won’t need to turn up the air conditioner during summer.

The type of insulation you choose and how much you install determines the efficiency of your home. There are many different materials and installation methods, but all rely on the same principle: to reduce unwanted heat transfer. The insulation specialists at REenergizeCO can recommend the right solution for your home and help you save money by increasing its energy efficiency.

Whether your home was built with the latest energy-saving standards, adding insulation can make it more comfortable and efficient. It also protects you from expensive repairs and replacements for your HVAC systems.

Newer homes are generally better insulated than older ones because building standards have improved. However, you can still add much value to your home by adding insulation and draught-proofing. Even small fixes like fitting an insulating jacket to your hot water cylinder can save you PS50 (PS40 in NI) per year in energy costs and 155kg (215kg in NI) of carbon emissions.

There are several ways to insulate your home; the most effective is to have it done by a professional. They can help you choose the correct thickness and R-value, determining how well it insulates. The higher the R-value, the more effective the insulation is.

Another benefit of insulating your home is that it can help you sleep better. Not only does it keep the temperature stable, but it also blocks out external noise, such as traffic, barking dogs, and birds. Having this peace when you come home is essential to relax.

Insulation doesn’t just help you save on your electricity bills; it can also lower your gas and fuel costs. It reduces reliance on other heating and cooling systems that consume large amounts of power, which benefits the environment. It can also protect against fires and act as a barrier against pests, such as wood-eating ants or termites.

A major question during winter is, “Does turning down the thermostat save money?” Depending on your energy habits, lowering your temperature can help you reduce your bills by as much as 10%. You have to be willing to get a little chilly.

According to the Department of Energy, heating accounts for up to 48 percent of your home’s energy consumption. So, it’s no surprise that this is one of the biggest areas where you can make some painless savings.

It’s important to remember that lowering your thermostat doesn’t reduce the energy your heater uses. Instead, it cuts back on the heat lost to the outside. When your house is warmer, it takes more energy for your heating system to replace that lost heat. But when you turn your thermostat down, the house isn’t as generous, so it requires less energy to stay comfortable.

The best way to save on heating bills is to keep the home’s temperature comfortable when you are at home and then turn it down for periods when you aren’t at the house (i.e. when you are sleeping or at work). You can also take it further and use a smart thermostat to do the heavy lifting and automatically reduce your home’s temperature.

Not only does this help you cut down on your energy bill, but it will also help the environment and improve your health. Studies have shown that if you lower your bedroom’s temperature to a reasonable level, you will fall asleep faster and enjoy a better night’s sleep than if the room is too warm.

To save on heating bills, the temperature in your home should be around 68 degrees while you are at home during the day and then drop to about 60 degrees during the night. You can also set your thermostat to a more moderate level at work or out of the house, known as a “setback” temperature.

During the winter, many homeowners try to keep their heating bills low by closing off rooms they do not use. This is a good idea since heating costs can quickly increase if you constantly turn the system on and off to warm or cool unused spaces in your home. However, shutting the doors to new spaces limits air circulation and does not save you energy.

Closing unused rooms does not cut your energy costs because it causes the heating and cooling system to work overtime to heat the rest of your home. Eventually, it leaks heated or cooled air out of closed rooms through cracks or gaps. This leaking air will cause your system to work even harder, and it can eventually damage your HVAC system.

It is a common belief that closing the doors to rooms that are infrequently used will improve energy efficiency by limiting airflow and forcing the space to stay warmer. This is a myth, and it will make your heating and cooling bills higher by causing your HVAC system to work overtime.

Instead of closing off unused spaces in your home, installing transfer grills to allow air to circulate freely between rooms is better. These are opaque and unnoticeable, and they can be installed into a door frame or next to it to provide a barrier-free way for air to move between spaces.

This method of preventing draughts also allows you to use your radiators in previously impossible spaces. This can help you save as much as PS115 per year, ensuring your home is warm throughout the winter. However, it is important to note that you should briefly leave your unused rooms unheated, as this can lead to internal problems in your home.

Understanding how draughts and poor insulation can affect your heating costs is important to minimize them as much as possible. If you need help improving the insulation in your Georgetown, Texas, home, contact us to discuss your options.

Air duct leaks are a major contributor to high energy bills. They allow conditioned air to escape into uninsulated spaces like attics, crawl spaces, and garages, which are then cooled or heated by the outside air. This wasteful energy use adds up quickly. A home with poorly sealed ducts can be up to 20% less efficient than one with well-sealed and insulated ductwork. This is why looking for duct leaks and getting them fixed as soon as possible is important.

Most of the time, leaking air ducts can be identified by visual inspection. Start by looking around the attic, crawl space, or basement. Check the ductwork for disconnected or sagging sections, holes, and tears. You should also pay special attention to areas where duct tape has been affixed, as this indicates that previous homeowners tried to patch leaks with it. This is not a permanent fix and should be removed to repair the ducts properly with mastic sealant.

Leaks in supply ducts can be easier to spot than those in return ducts. This is because leaks in the return ducts can pull conditioned air from unconditioned spaces, making it harder for your HVAC system to reach its set thermostat settings. This extra work will cost you higher energy bills, especially during hot and humid weather.

In addition to wasting energy, leaking ducts can lead to other problems in your home, including uncomfortable rooms and stuffy atmospheres. The escaped nonfiltered air also collects dust and other allergens throughout your house, which can be difficult to keep clean.

A professional can perform a more detailed duct inspection using tools such as a blower-door test and a duct blaster to detect leaks that are not obvious to the naked eye. In most cases, professional duct sealing will involve using an aerosol spray that can penetrate deep into duct joints and seams to seal them permanently. The result is a home that is more comfortable, energy-efficient, and safe from health concerns.

post

Why Septic Tank Repair Is Necessary

Everything that goes down your drains or is flushed into toilets ends up in the septic tank. This includes chemicals and household waste that shouldn’t enter the system, like pharmaceuticals, oil, paint, and antifreeze.

Septic Tank Armadale is vital for protecting your home and its natural environment. Luckily, many problems can be repaired fairly inexpensively. 

septic tank

The drain lines in your home carry wastewater away from sinks, toilets, and tubs. They all connect to a huge main sewer line that leads to your septic tank or leach field. If this line becomes clogged, it could affect your home’s plumbing systems.

Most clogged drains are caused by objects that get stuck in the pipe. These items include soap scum, laundry lint, slimy bacteria, and small rocks or other debris that can’t pass through the pipes. Over time, these materials build up into a solid mass that blocks the entire pipe.

Other causes of septic system drain clogs are grease, food scraps, paper products, and pet waste. Fats and oils may seem liquid when you pour them down the drain, but they quickly clump into a clog that stops water flow. To avoid these problems, always dispose of grease in a separate container. Then, put the container in the trash for proper disposal.

Another common cause of clogged drains is a broken septic tank or septic system component. If you’re concerned about your septic system, have the tank inspected by a professional. They’ll be able to tell you whether the problem is with your septic tank or the pipe between it and your house.

Call a plumber immediately if you notice sewage backing up into your drains. They’ll be able to locate the problem and make the necessary repairs.

Occasionally, you’ll encounter a clog requiring extra elbow grease to remove. If you don’t want to call in a plumber, try using hot water, baking soda, and vinegar. This can break up most clogs without the need for expensive equipment.

A septic tank that needs to be repaired can also result from an outdated or undersized system. If your family has grown and you’re overusing the septic tank, upgrading the system as soon as possible is important. This will prevent the tank from becoming too full and overflowing. It will also help reduce your home’s waste and ensure the system works as efficiently.

If sewage backs up into drains, you have a serious problem that immediately requires professional attention. Sewage is a dangerous and unhealthy substance and can easily spread harmful bacteria throughout your home. If you suspect a septic tank problem, you should call a local plumber immediately to ensure that it is dealt with before it worsens.

Leak lines are one of the most common problems with septic tanks. This can be caused by various things, including overflow from the tank or cracked and broken pipes. This is why it’s important to have a septic system that is properly maintained and regularly inspected by a certified professional.

A leaking septic tank will cause wastewater and sewage to leak into your yard. This can lead to health hazards and expensive repairs, so getting a septic system repair company in as soon as possible is important to fix the issue.

Another reason for a leaking septic tank is that the leach field is failing or saturated with water. If this happens, sewage will go back into your drains, damaging your home’s plumbing, groundwater, surface water, and soil.

You can avoid this problem by only flushing human waste and toilet paper down the drains, having your septic system inspected annually, and parking vehicles and heavy machinery away from the leach field. If the leach field cannot handle the amount of wastewater sent there, it may need to be replaced, which is an expensive repair.

The inlet baffle from the house to the septic tank is also a common failure point. If this fails, it will take longer for drains to empty, and the wastewater won’t be filtered as it should be. Usually, this is an easy fix that a service professional can do for a relatively low cost.

Concrete septic tanks are less likely to crack, but extreme weather and soil conditions can still damage them. Typically, repairs to these tanks are more costly than repairs to plastic ones because they require more labor and time to replace parts.

The purpose of your septic system leach field is to absorb wastewater into the soil after it’s been broken down by bacteria in your septic tank. If the area around your septic tank, drain lines, and toilets is wet, mushy, or even has standing water, this can indicate a problem with your leach field.

A damaged leach field can result in sewage backup, flooding, and other costly repairs to your home. To prevent this, you should divert water runoff from your yard and gutters away from the septic tank, drains, septic leach field, and other pipes in your septic system. This can be done by installing a rainwater catchment system or directing the runoff into the yard or landscaping beds, where it will soak rather than in the pool.

You should also regularly check your leach field’s condition to ensure it is working as it should. If your leach field isn’t absorbing the wastewater properly, you may need to replace it. If your family’s household size has increased, you might need to upgrade the size of your septic tank as well.

Leach field problems can be caused by many factors, including a failure to have your septic tank pumped regularly, putting too much waste down the drains, using garbage disposal excessively, or using too much water at once. A failing leach field can also result from disconnection or crack in a line from the septic tank to the drain field or a ruptured leach pipe.

If you notice any of these signs, it’s important to call a professional for septic tank repair as soon as possible. Performing these repairs in the early stages can save you thousands of dollars in repairs and replacement costs. Avoid costly septic tank repair by having your system inspected and pumped regularly, usually every 2-3 years. You can also keep your septic system in good shape by only flushing human waste and toilet paper, not dumping grease into the drains, and having your tank pumped as needed.

The septic tank is vital to the home, and if it gets full or overflows, you will need professional septic tank repair. Usually, the problem is not in the tank itself but rather with the plumbing from the house. Some of it is easily fixed, like clogged vents or sewer lines, but the septic tank itself is a whole different ball of wax and requires an expert eye to see when there is an issue.

The first thing to do if the septic tank starts overflowing is to turn off all the water in the house. This will stop the flow and prevent more sewage from entering the home, keeping it clean and safe for everyone in the family. You should also only use the toilets or showers once the tank is emptied and the issue is resolved. Showering at a friend’s or neighbor’s home or going to a laundrette are all good options until you can get the situation under control.

Another reason a septic tank may overflow is if the solid waste needs to be properly disposed of in the home. Many must realize that toilets are not trash cans, and flushing items like dental floss, disposable diapers, feminine hygiene products, or cooking grease can be a big mistake. These things can clog drain pipes and throw off the delicate microorganisms in the septic tank, making it fill up prematurely.

If you are experiencing a septic tank overflow, it is important to call a service provider as soon as possible to have the tank emptied and the plumbing checked. They can determine if the problem is something you can fix or if the tank needs to be replaced altogether.

If you are experiencing frequent repairs, it is probably a good idea to replace the septic tank completely. This is because frequent repairs are usually more expensive than replacing the system. This is especially true if the tank overflows regularly, which can lead to a very costly mess.

post

Faucet Repair – How to Repair a Leaking Faucet

Faucets that leak can quickly become a major source of water damage in your home. While a few drips here and there can be corrected by tightening the handle or replacing worn parts, extensive rust or hard-water deposits may require replacement of the entire faucet.

Faucet Repair

Remove the decorative cap from each handle and expose the screw underneath with a flathead screwdriver. Set the screws aside in order of removal to save time when reassembling the faucet. Click Me to learn more.

Disassembly is necessary to inspect and clean the components, whether the faucet is sputtering or not. Often, the problem can be resolved by cleaning or replacing washers or O-rings that are easy to reach. You can also clean out any mineral deposits, dirt, or debris that may be causing the faucet to not work properly. During this process, it is important to take care not to damage any of the components.

To disassemble a faucet, start by shutting off the water supply at the two valves below the sink. Then, remove the handle by turning the screw in the middle of each handle counterclockwise. If the handle is corroded and doesn’t come off easily, try using a handle puller to make the job much easier.

Once the handles are off, you can start removing other parts of the faucet. First, locate the cartridge and the retaining clip that holds it in place. Then, use pliers to remove the retaining clip, which is circular in shape. Once the retaining clip is removed, you can then remove the cartridge.

After removing the cartridge, you can examine it for any signs of wear or damage. If it is damaged, you can replace it with a new one from your local hardware store. It is important to use a cartridge that is designed for your specific faucet model to ensure a proper fit.

If the cartridge is in good condition, you can then move on to removing the metal clips that hold it in place. These are circular metal clips that are located in the holes in the faucet body. You can usually locate them by looking at the underside of the faucet, or by removing the handles and seeing which part they are attached to. Once you have removed the metal clips, you can then replace the cartridge and reassemble the faucet.

If you have any other issues with your faucet, you can replace them as needed. You can purchase replacement parts from your local hardware store or online. Be sure to use the exact type and number of parts as recommended by the manufacturer to avoid any problems with a misalignment or leaks.

Inspect the Parts

A faucet’s parts can become worn out over time. Routinely check them for signs of wear and tear, and replace components as needed. Common problems include leaking, stiff or loose handles, and low water pressure. Fixing or replacing these components can restore functionality and improve the appearance of the sink.

Leaking: A dripping faucet wastes water and can damage your sink and countertop. Replacing the washers, seals, or cartridge can often solve this problem.

Stiff or Loose Handles: Over time, faucet handles can become difficult to turn on and off. This is usually caused by a worn-out handle mechanism or loose connections. Lubricating the handle mechanism or tightening the connection can help.

Low Water Pressure: Over time, mineral deposits can build up in the aerator and restrict water flow. Cleaning or de-scaling the aerator can help.

Leaky Faucet Body: In some cases, the valve seat may become worn out, causing leaks. Replace the valve seat or cartridge to resolve this issue.

Before you start working on your faucet, make sure that the shut-off valves are completely turned off. Then, place a bucket underneath to catch any residual water that may drip from the supply tube connections.

Remove the decorative escutcheon caps from the faucet handles to expose the mounting screws. Use a screwdriver to remove the caps and the handle(s). Once the handles are removed, you should see the mounting nuts for the spout (if applicable) and the faucet body. Remove these using channel-type pliers.

While you’re removing these nuts, be careful not to crack or scratch the sink or faucet. If the nut is too hard to grip with your fingers, you can try using an adjustable wrench or a basin wrench (which are designed to fit into small spaces). Whenever possible, always use hand-tightened locking nuts instead of force-tightened ones, as these are less likely to crack or break. After you’ve removed the old faucet and its supply lines, install the new faucet by sliding the water line hoses through the holes in the sink. Be sure to hand-tighten the locking nuts before moving on, and then finish tightening them with a pair of Channellock pliers.

Replace the Parts

A faucet is meant to last a long time, but regular use (which can cause wear on protective coatings or force the handles to move too hard) and environmental factors (such as hard water or mineral deposits) can shorten its lifespan. Faucets of all types can experience problems over time, including dripping, handle stiffness or looseness, and insufficient water flow. Fortunately, many of these issues can be resolved by replacing the necessary parts.

Before beginning any repair work, turn off the water supply by closing the shut-off valves located under the sink. You should also turn off the water supply to your home’s hot water heater if it is still on. Once the faucet is turned off, use a cloth or sponge to wipe it down to remove dirt, soap scum and mineral deposits. Regular cleaning can help extend the life of your faucet and reduce the need for more frequent repairs.

If your faucet is dripping, the problem may be caused by worn washers or a corroded valve seat. Replacing the washers or installing a new seat should fix the leak. In the case of a cartridge-style faucet, a faulty disc inside the cartridge can also cause a drip. Symptoms of this type of problem include the hot or cold water knob turning the wrong direction to turn on or off the faucet; replace the cartridge to correct the issue.

Aerators can become clogged with mineral deposits, which restricts the flow of water and can lead to water pressure problems. You can remove aerators by removing the decorative cap on top of the faucet or by using a special tool known as a faucet aerator key wrench. Once the aerator is removed, you can clean it by placing it in a bucket of vinegar or by soaking it in a descaling solution. You can then reassemble the aerator and reattach it to the faucet. It’s a good idea to take pictures of the disassembled faucet before beginning repair work so that you can easily reassemble it in the proper order. You should also note the position of each part so that you can easily identify them when reassembling the faucet.

Reassemble the Faucet

Once you have replaced the faulty components, it’s time to reassemble your faucet. Be sure to apply plumber’s tape to the threads of the valve and washers before reassembling to help create a watertight seal and prevent future leaks.

Begin by turning off the water supply to the dripping faucet. Use a sink basket strainer to catch any loose parts that fall during disassembly.

Next, remove the handle. On some faucets, the screw that holds the handle in place is concealed under a decorative cap. Gently pry off the cap with a knife blade to expose the screw, and then unscrew the handle screw with a screwdriver. On other types of faucets, the screw is located under a decorative sticker. You may need to remove the sticker with a blade or pliers to access the screw. Once the screw is removed, lift off the handle and the handle assembly.

You can now access the faulty cartridge or valve. Examine the replacement part for signs of wear and tear or damage, and make sure that it matches the original part that was installed in your faucet. Many issues with faucets are caused by worn-out washers and O-rings, so be sure to replace any that are damaged or worn down.

If your faucet has a disc cartridge, it is possible that the ceramic disk inside has cracked. This can lead to leaking from the bottom of the cartridge. It’s important to replace the cartridge in order to repair this type of leak. Once you have the new cartridge, install it into the faucet body and secure it with the retainer clip. You may need to twist the cartridge to ensure it is completely seated.

Once you’ve reassembled the faucet, turn the water supply back on and test it out by turning the handle to both hot and cold settings. If there are still leaks, it’s likely that you missed a connection during the disassembly or installation process, so check each joint for tightness and repair as needed. If the leaks persist, it’s time to call in a professional plumber.

post

The Importance of Plumbing

Plumbing provides essential services like clean water and waste disposal. It also contributes to public health, environmental sustainability, and overall quality of life.

Plumbing

Unlike most trades, plumbing requires a combination of education and on-the-job training. This can be accomplished through a vocational school, community college, or learn-while-you-earn apprenticeship program. Visit https://tidalplumbingnyc.com/ to learn more.

The plumbing system consists of pipes, fixtures, and appliances that facilitate the transmission of water in residential and commercial settings. It is vital for the health and comfort of occupants, allowing them to enjoy clean water and proper drainage. Plumbers specialize in the installation and maintenance of these systems, following building codes and blueprints to ensure that all components are properly connected.

In industrial settings, process piping refers to the interconnected tubing that is used in the semiconductor, paper processing, petroleum refining, and pharmaceutical industries. These tubes transport chemicals, gases, and other liquids to and from various processes. These pipes must be properly installed and maintained to ensure safety and efficiency.

A plumbing system consists of a network of pipes that transports water to and from fixtures, such as toilets, showers, sinks, and dishwashers. These pipes are typically made from nontoxic materials, such as porcelain, copper, steel, or plastic. They are also designed to withstand the pressure and temperature of the transmitted liquids. The plumbing system also includes sewage pipes, which carry waste to the sewer system or private septic tank.

In order to effectively maintain a plumbing system, you should regularly inspect and repair all faulty parts. This will help to avoid expensive plumbing repairs in the future. In addition, it is important to choose the right piping materials for your needs. For example, PEX piping is ideal for domestic water supply lines, while CPVC is the best choice for hot and cold water pipes.

Plumbing and sewage systems

While it may be tempting to think that plumbing systems only deal with sinks, showers and toilets, the reality is much more complicated. Plumbing isn’t just about getting water where we need it; it also carries away our waste and protects the environment.

A sewage system uses a network of pipes to transport sewage, which contains dangerous pathogens, to treatment plants. This process ensures that the toxins are removed and returned to the environment safely.

Sanitary sewer systems are made up of a series of pipes, manholes and pumping stations that transport sewage from houses to wastewater treatment plants. These facilities are necessary to protect water quality and public health, as well as prevent the overflow of raw sewage into rivers and streams.

These systems are used in conjunction with a storm sewer, which collects rain and melting snow that otherwise would flow directly into rivers and waterways without treatment. This can lead to flooding and pollution, which is why it’s important to maintain your sewage and drainage systems.

If you’re unsure about the state of your sewage system, it’s a good idea to get a sewage protection plan from HomeServe. Their plans offer 24/7 emergency repair service from a professional plumber, so you can rest assured that your home’s sewage system is in good hands. These plans also come with other benefits, including savings on plumbing costs and repairs.

Plumbing and heating systems

Plumbing is the system of pipes and fixtures that deliver clean water, remove waste, and regulate temperature in a home or building. It is essential to a healthy environment, and efficient plumbing systems reduce the risk of water-borne illnesses by providing safe drinking water and removing hazardous wastewater.

Plumbers install new plumbing systems, following blueprints and building codes to ensure proper placement of piping and fixtures. They also repair and maintain existing plumbing, including leaky pipes, clogged drains, and noisy faucets. They use specialized tools to inspect, repair, and replace plumbing components.

Most plumbing systems consist of water supply lines, drain pipes, vent pipes, and gas lines. Water supply lines carry freshwater into homes from public water systems or private wells. These lines connect to faucets, showers, bathtubs, sinks, and other appliances. Wastewater from these fixtures flows through drain pipes into sewer systems or septic tanks. Vent pipes keep air pressure balanced in the plumbing system.

Plumbers also install and maintain heating systems, which warm or cool rooms depending on the season. They can install electric, oil, or gas-powered heaters and furnaces. Plumbing and heating systems that are more energy-efficient can save homeowners money on their utility bills. In addition, they help conserve precious water resources and are environmentally friendly. Plumbing and heating systems that require fewer cycles also have a longer lifespan than traditional models.

Plumbing and cooling systems

The plumbing system is essential to the health and comfort of a building’s inhabitants. It is also essential to a building’s structural integrity. Plumbing systems are typically regulated by local building permit departments to ensure they meet minimum American design standards set by either the Uniform Mechanical Code or International Mechanical Code.

P-Trap – A curved piece of drainage pipe that keeps noxious gases from escaping up through the drain; every fixture with a drain has one (except toilets which have S-traps). Pipe Wrench – Tool for holding and turning pipes. Fitting – A device that allows pipes of different sizes or materials to fit together. Vent – A vertical pipe that runs from the last two traps on a plumbing system’s drain line to the main vent stack for the building drainage system.

Carbon Monoxide – A colorless, odorless gas that results when carbon burns without sufficient oxygen. HVAC systems use CO to warm the air. HVAC system CO levels are measured in parts per million or cubic feet per minute. The CO level should be less than 10 ppm.

Plumbing and water treatment systems

Whether your water supply comes from the city or from a well, water treatment systems can help reduce impurities and contaminants. These systems filter your home’s water and remove harmful substances from the pipe system, ensuring that you are getting clean, safe water for consumption and other uses.

When you use your toilets, showers, sinks and more, wastewater is directed into a sewer line that leads to the main sewer line. As this water makes its way downhill, gravity helps it flow toward the treatment plant. If there is a point at which this gravity stops working, a lift station is used to move the wastewater vertically so it may continue downhill to the treatment plant.

Once wastewater has reached the treatment plant, it undergoes a variety of different processes to remove harmful bacteria and other microorganisms that can cause diseases. These processes include chemical coagulation, sedimentation, filtration and disinfection.

One of the most popular water treatment systems on the market is a reverse osmosis (RO) system. This system works to remove dissolved mineral salts from your water, leaving you with fresher and cleaner water. However, RO systems are not ideal for everyone because they can be expensive to maintain. If you’re interested in a better option, consider a water softener instead. This system is more affordable and can help reduce rust stains, scale buildup and dry itchy skin.

Plumbing and drainage systems

A well-designed plumbing and drainage system is essential for a building to function properly. If you have a poorly designed plumbing system, it can lead to leaks and overflows which can damage your home. In addition to preventing water leaks and overflows, proper plumbing and drainage systems also help you manage waste disposal.

Plumbing is the network of pipes that bring freshwater into a building and take waste water away. It is usually underground and includes drains, sewers and rainwater collectors. It also involves installing appliances like sinks, toilets and bathtubs. Plumbing reached its early apex in ancient Rome with expansive systems of aqueducts and tile wastewater removal.

The plumbing and drainage systems of a house are connected by a main drain. The house drain carries the waste and water from the toilets, washing machines and dishwashers to the sewer pipe. This system is important to prevent the build-up of mould and mildew in the house.

It is also important to maintain your plumbing system by inspecting it regularly. This will allow you to find and repair any problems before they become worse. Common plumbing issues include leaking or damaged pipes, blocked drains and low water pressure. You can hire a professional plumber to help you with these issues. They will have the skills and knowledge to fix the problem quickly and efficiently. They will also provide you with advice on how to maintain your plumbing and drainage system.

post

DIY Methods for Drain Cleaning

Drain cleaning is an important part of your plumbing maintenance. Many different products are available to unclog your drains, from chemical cleaners to natural, eco-friendly alternatives.

Drain Cleaning

For simple clogs, try a plunger or homemade drain cleaners made from baking soda and vinegar. For more serious blockages, you can use an acid drain cleaner but be sure to follow safety guidelines and protect your pipes.

A clogged drain is a household nightmare. Whether you’re trying to hop in the shower for your morning wake-up or get food prep done in the kitchen, having to wait for the water to flow down the drain can ruin your day and maybe even cause some water damage. But before calling a plumber, there are some DIY methods that can help you clear your drains.

The best way to clean a clogged drain depends on how and where the clog formed. For a sink or tub drain, pouring boiling water can often dislodge soap scum buildup and grease clogs. If the clog is in your drain trap, you may need to remove it and clean the entire thing.

There are a variety of tools that can help you with this task, including plastic drain cleaning strips and snakes. A wire hanger can also be used as a more rudimentary option, though you’ll want to use caution and be prepared for some grossness (think decomposing hair and gunk). Simply unwrap the end of the coat hanger and bend it into a small hook, then feed it down the drain. Once it hits the clog, wiggle it around and pull it up. This could take a bit of time, but will eventually break up and clear the clog.

Pouring baking soda and vinegar down your drain can also be a good solution for many clogs. Baking soda is alkaline and vinegar is a mild acetic acid, so when they mix, they react to create foaming action that can dislodge clogs. Mix an equal amount of table salt with the baking soda and pour it down the drain. After a few minutes, add two cups of boiling water down the drain and watch as the mixture flushes away your clog.

To keep your drains working properly, Calabrese recommends using a product like Bio-Clean once a month. It introduces a bacterial strain that will keep your pipes healthy while breaking up any gunk and preventing future blockages. You can purchase this product online or from a local hardware store.

Boiling Water

This is a simple and effective way to clear a clogged drain, particularly one involving hair. Fill a kettle and bring it to a boil, then slowly pour the boiling water down the drain in two or three stages, waiting several seconds between each pour so that the hot water has time to work on the gunk blocking the drain. You may need to repeat this process a few times before the drain is completely clear.

Another useful tip is to use boiling water in combination with baking soda and vinegar. This method is ideal for grease or soap clogs, as the hot water melts the grease and the baking soda works as a natural scouring agent forcing it out of the pipes. Pour a cup of boiling water down the drain, followed by a cup of baking soda and a half cup of white vinegar (it will fizz). Be sure to cover the drain opening to concentrate the cleansing reaction inside the pipe and then flush with more boiling water.

If you’re dealing with a tough clog, it’s possible that the problem extends further into the pipes. If this is the case, it’s best to call a plumber as chemical drain cleaners are more likely to damage your pipes than help them.

A professional can also help if the clog is caused by a broken pipe or sewer backup. In some cases, a plumber will need to snake the drain with a tool called a cable snake, which is essentially a long piece of flexible wire with a hook on the end that’s used to grab and pull the clog out of the pipe. A plumber can also use an auger to break up and remove a clog, but this method is more expensive.

If you’re not comfortable using a plumber, or the clog doesn’t seem to be going away, try a homemade plumbing snake made from a wire coat hanger. Straighten out the hanger as much as you can, then bend one end into a small hook. Fish that end down the drain, hooking onto any hair or gunk stuck in the pipes and pulling it out.

Baking Soda & Vinegar

Using baking soda and vinegar to clean your drain is an all-natural, inexpensive alternative to commercial drain cleaners. This simple hack is quick and easy, and you probably already have the ingredients at home. Plus, it’s much safer for your pipes than corrosive chemicals that can eat away at your pipes and cause chemical burns on your skin.

When you pour baking soda and vinegar down your drain, it creates a fizzing reaction that can break up small blocks of gunk in your drain. The mixture can also help deodorize your drains by destroying the bacteria that cause foul smells.

The only downside to this DIY solution is that it’s not effective for all types of clogs. For example, if your clog is caused by a large block of fat, it will likely take more than a fizzing mixture to dissolve it. You will need to use a drain snake or other tools to remove the blockage.

Another thing to keep in mind when using baking soda and vinegar is that the chemical reaction they create can damage your pipes if left unattended. The carbon dioxide gas produced by the reaction can build up and put pressure on your pipes, especially if you have older pipes made from copper or brass.

To avoid this problem, make sure to flush your drains with hot water after each application of baking soda and vinegar. You should also only use this method for minor clogs and not on a regular basis. Using this method too often can cause the material in your pipes to deteriorate, leading to future clogs and more expensive repairs.

If you are struggling with a major clog, it’s best to call a professional plumber instead of trying to fix the problem yourself. Professional plumbers will have the equipment needed to get your clog under control and prevent further problems down the road.

Call a Plumber

If your drains are clogged to the point where they are starting to smell, you will definitely want to call a plumber for professional drain cleaning. The clog may be caused by mold spores that grow in dark, damp areas. Regular drain cleaning can prevent a buildup of these spores, keeping your home fresh and clean.

A plumber will also be able to identify the cause of the clog. If it is a result of hair or soap scum, the plumber will be able to remove these things from the lines with ease. However, if the clog is caused by a broken pipe or sewer backup, they will need to use more advanced equipment to fix it.

You should also give the plumber a call when your drains are operating slower than usual. This could be a sign of an impending clog that isn’t going to resolve itself. A skilled plumber will be able to use specialized tools to get to the root of the problem and unblock your drains in no time.

Another sign that it’s time to call the plumber is if your toilet is overflowing or your shower is backing up into the tub. This is a serious issue that can put you and your family at risk of illness and bacteria.

Finally, if you have tried using household remedies like chemical drain cleaners or a plunger and the clog persists, it is time to call a plumber. These DIY solutions often only address the symptoms of a drain clog and can permanently damage your plumbing pipes. A plumber will be able to diagnose the cause of the clog and find a long-term solution that is safe for your plumbing system.

When drains are acting up, it is important to act quickly to avoid a bigger problem down the line. Don’t wait to call a plumber for drain cleaning, especially if it is that one annoying drain in your guest bathroom. A quick call to a local plumber can save you money, time, and frustration in the long run.